Support our educational content for free when you buy through links on our site. Learn more

🎵 Ultimate Guide to Music Makers: Top Tools & Tips (2026)
Ready to unlock your inner musician and create your own hits? Whether you’re a bedroom producer, a seasoned songwriter, or just curious about what a music maker really is, this comprehensive guide has you covered. From the history of music-making tools to the latest software and hardware options, we dive deep into everything you need to know to start making music today — and make it sound great!
Did you know the global music software market is booming, valued at over $3 billion and growing fast? That means more tools, more innovation, and more ways for you to craft your sound. We’ll also share insider tips on setting up your home studio, workflow secrets from pros, and how to monetize your creations. Curious about which DAW reigns supreme in 2026? Or how to blend hardware synths with digital workstations? Stick around — the answers might surprise you!
Key Takeaways
- Music makers range from beginner-friendly apps to professional DAWs and tactile hardware instruments.
- Choosing the right tool depends on your style, skill level, budget, and workflow preferences.
- Setting up a home studio properly, including acoustic treatment and gear selection, is crucial for quality recordings.
- Modern workflows blend recording, arranging, mixing, and mastering — all within your chosen music maker.
- Online collaboration and mobile music makers expand creative possibilities beyond the traditional studio.
- Protecting your music rights and understanding monetization strategies are essential for turning passion into profit.
Ready to explore the best music makers of 2026 and start your musical journey? Let’s dive in!
Table of Contents
- ⚡️ Quick Tips and Facts About Music Makers
- 🎶 The Evolution and History of Music Makers: From Analog to Digital
- 🎛️ What Is a Music Maker? Understanding the Basics and Types
- 🎹 Top 10 Best Music Maker Software Programs in 2024
- 🎧 Hardware Music Makers: Synthesizers, Drum Machines, and Controllers
- 💡 How to Choose the Right Music Maker for Your Style and Skill Level
- 🔧 Step-by-Step Guide: Setting Up Your Music Maker Studio at Home
- 🎼 Music Maker Workflow: From Idea to Finished Track
- 🎤 Recording Vocals and Instruments with Your Music Maker
- 🎚️ Mixing and Mastering Tips for Music Makers: Pro Secrets
- 📱 Mobile Music Makers: Creating Hits on Your Phone or Tablet
- 🌐 Collaborating Online: Using Cloud-Based Music Makers and Platforms
- 💾 Exporting and Sharing Your Music: Formats, Platforms, and Best Practices
- 💰 Monetizing Your Music Made with Music Makers: Tips and Strategies
- 🛠️ Troubleshooting Common Issues with Music Makers
- 🎉 Inspiring Success Stories: Musicians Who Started with Music Makers
- 📚 Recommended Learning Resources and Tutorials for Music Makers
- 🔗 Recommended Links for Music Maker Enthusiasts
- ❓ Frequently Asked Questions About Music Makers
- 📖 Reference Links and Further Reading
- 🏁 Conclusion: Your Journey with Music Makers Starts Here
⚡️ Quick Tips and Facts About Music Makers
Ever wondered if you could truly make your own song without a fancy studio or a degree in audio engineering? The answer, my friend, is a resounding YES! 🎉 Welcome to the exciting world of “music makers” – a term that, for us at Make a Song™, encompasses everything from powerful digital audio workstations (DAWs) to intuitive mobile apps and even classic hardware instruments. It’s about empowering you to unleash your inner artist.
Here are some quick, juicy facts and tips to get your creative juices flowing:
- Accessibility is Key: Modern music-making tools are more accessible and affordable than ever before. You don’t need to break the bank to start producing professional-sounding tracks. In fact, some incredible platforms are completely free! Speaking of free, have you checked out our deep dive into Is BandLab Music Maker Studio Free? The Ultimate 2026 Guide 🎶? It’s a must-read!
- Software vs. Hardware: While software DAWs dominate, don’t underestimate the tactile joy and unique sounds of hardware synthesizers, drum machines, and MIDI controllers. We’ll explore both sides of this coin.
- Learning Curve Varies: Some music makers are designed for absolute beginners (think drag-and-drop loops), while others offer deep, professional-grade control. Choose wisely based on your current skill level and ambition.
- Collaboration is Easy: The internet has revolutionized music creation, making it simple to collaborate with artists across the globe. No more mailing tapes back and forth!
- Your Phone is a Studio: Seriously! Many powerful music-making apps exist for iOS and Android, turning your smartphone into a portable production powerhouse.
- It’s a Journey, Not a Race: Don’t get discouraged if your first few tracks aren’t Grammy-worthy. Every producer, even the legends, started somewhere. Consistency and curiosity are your best allies.
Did you know? The global music software market size was valued at over USD 3.1 billion in 2022 and is projected to grow significantly, indicating a massive and growing interest in digital music creation! That’s a lot of people making noise – in the best way possible!
🎶 The Evolution and History of Music Makers: From Analog to Digital

Before we dive into the shiny new world of digital music creation, let’s take a quick, fascinating trip down memory lane. The concept of a “music maker” isn’t new; it’s simply evolved dramatically. From the earliest human voices and percussion to complex orchestral arrangements, people have always found ways to create and share sound.
The Roots: Acoustic Instruments and Early Recording
For centuries, music-making was a purely acoustic affair. Instruments like pianos, guitars, and drums were the original “music makers.” The advent of recording technology in the late 19th and early 20th centuries, with pioneers like Thomas Edison and Emile Berliner, allowed music to be captured and reproduced. Imagine the magic of hearing a song played back for the first time!
As we moved into the 20th century, electronic instruments began to emerge. The Theremin (1920s) and the Ondes Martenot (1928) were early, quirky examples, paving the way for the synthesizers that would revolutionize music.
The Analog Revolution: Synthesizers, Drum Machines, and Tape
The mid-20th century brought the golden age of analog electronic music. Companies like Moog and ARP introduced groundbreaking synthesizers in the 1960s and 70s, allowing musicians to craft entirely new soundscapes. Drum machines, like the iconic Roland TR-808, gave artists rhythmic power previously only available with a live drummer. Multi-track tape recorders became the standard in studios, enabling musicians to layer instruments and vocals, building complex arrangements track by track.
It was during this vibrant era that music itself became a “maker” of culture, influencing generations. Speaking of influential music, have you ever listened to Jimmy Cliff’s “Music Maker”? It’s a fantastic track from 1974 that perfectly encapsulates the spirit of creation and connection through sound. If you haven’t, the first YouTube video embedded above in the article covers this classic and is definitely worth a listen! It’s a great reminder that the essence of making music transcends technology.
The Digital Dawn: MIDI and Early DAWs
The 1980s ushered in the digital age with the introduction of MIDI (Musical Instrument Digital Interface). This revolutionary protocol allowed electronic instruments to communicate with each other and with computers. Suddenly, a keyboard could control a synthesizer, and a computer could sequence entire compositions. This was a game-changer!
Early digital audio workstations (DAWs) began to appear, initially as expensive, dedicated hardware systems. But as personal computers became more powerful, software-based DAWs started to emerge, putting the power of a recording studio onto a desktop.
The Modern Era: Software Dominance and Democratization
Today, software DAWs are the undisputed kings of music production. They offer unparalleled flexibility, an endless array of virtual instruments and effects, and the ability to record, edit, mix, and master all within a single application. This shift has democratized music creation, allowing anyone with a computer (or even a smartphone!) to become a producer.
This evolution isn’t just about technology; it’s about preserving musical heritage. Organizations like the Music Maker Foundation play a crucial role in this. As their Executive Director Tim Duffy emphasizes, they support traditional blues artists, ensuring their music “keeps traveling.” Take Jeffrey Scott, a Piedmont blues musician and nephew of legend John Jackson. As Living Blues Magazine noted, he’s “a living link to an era before television and the Internet monopolized people’s spare time” (musicmaker.org). His story, and that of Earnest “Guitar” Roy who was “born into” the blues tradition (musicmaker.org), remind us that while the tools change, the spirit of music-making, the drive to share stories and emotions through sound, remains constant. Roy, for instance, is excited to “lead the way” at Music Maker’s new studio, symbolizing a new chapter for the foundation while honoring the past.
So, whether you’re using the latest software or a vintage analog synth, you’re part of a rich, ongoing history of sound creation. What will your contribution be?
🎛️ What Is a Music Maker? Understanding the Basics and Types
Alright, let’s get down to brass tacks. When we talk about a “music maker” here at Make a Song™, we’re referring to any tool or platform that allows you to compose, record, arrange, mix, and produce music. It’s your digital (or analog!) canvas for sound. Think of it as your personal sonic laboratory!
The Core Functionalities of Any Music Maker
No matter the type, most music makers share a common set of functionalities that are essential for crafting a complete track:
- Recording: Capturing audio from microphones (vocals, instruments) or line-in sources (guitars, synths).
- MIDI Sequencing: Recording and editing musical performance data (notes, velocity, timing) from MIDI controllers, which can then trigger virtual instruments.
- Arrangement: Structuring your song by arranging different sections (intro, verse, chorus, bridge, outro) and tracks (drums, bass, melody, vocals).
- Editing: Fine-tuning audio and MIDI. This includes cutting, copying, pasting, quantizing (snapping to a grid), pitch correction, and time stretching.
- Mixing: Balancing the volume, panning (left/right placement), and applying effects (reverb, delay, EQ, compression) to individual tracks to create a cohesive sound.
- Mastering: The final polish on your mixed track, optimizing its overall loudness, clarity, and stereo image for distribution.
Types of Music Makers: A Spectrum of Creativity
The world of music makers is wonderfully diverse. Here’s a breakdown of the main categories you’ll encounter:
1. Digital Audio Workstations (DAWs) – The Software Powerhouses 💻
These are the titans of modern music production. DAWs are comprehensive software applications that provide an all-in-one environment for every stage of music creation. They come packed with virtual instruments, effects, and powerful editing tools.
- Pros: Incredible flexibility, vast sound libraries, professional-grade mixing and mastering capabilities, endless possibilities for sound design.
- Cons: Can have a steep learning curve, often require powerful computers, some can be quite an investment.
- Examples: Ableton Live, Logic Pro X, FL Studio, Pro Tools, Studio One.
2. Mobile Music Making Apps – Your Pocket Studio 📱
These are streamlined versions of DAWs or specialized tools designed for smartphones and tablets. They’re perfect for capturing ideas on the go, sketching out beats, or even completing full tracks.
- Pros: Portability, instant inspiration, often very intuitive, many free or low-cost options.
- Cons: Limited processing power compared to desktop DAWs, smaller screen size can be restrictive, fewer advanced features.
- Examples: GarageBand (iOS), FL Studio Mobile, BandLab, Koala Sampler.
3. Hardware Music Makers – The Tactile Experience 🎛️
Before software took over, hardware was king, and it’s still thriving! This category includes physical instruments and devices designed specifically for music creation.
- Synthesizers: Electronic instruments that generate sounds using various synthesis methods (e.g., subtractive, FM, wavetable).
- Drum Machines: Dedicated devices for creating rhythmic patterns and beats.
- Samplers: Instruments that record and manipulate audio snippets (samples).
- MIDI Controllers: Devices (keyboards, drum pads, faders) that don’t make sound themselves but send MIDI data to control software or other hardware.
- Pros: Tactile workflow, unique sonic character, often inspiring hands-on experience, can be less prone to computer issues.
- Cons: Can be expensive, less flexible than software, often require additional gear (audio interface, mixer), can take up physical space.
- Examples: Korg Minilogue, Roland TR-8S, Akai MPC Live, Native Instruments Komplete Kontrol.
4. Online/Cloud-Based Music Makers – Collaborative Creativity 🌐
These platforms allow you to create music directly in your web browser, often with collaborative features that let multiple users work on a project simultaneously.
- Pros: No installation required, easy collaboration, accessible from any device with internet, often free tiers.
- Cons: Dependent on internet connection, latency can be an issue, features might be less robust than desktop DAWs.
- Examples: Soundtrap, BandLab (again!), Splice Studio.
Quick Comparison Table: Music Maker Types
| Feature / Type | DAW Software | Mobile App | Hardware Instrument/Controller | Online Platform |
|---|---|---|---|---|
| Complexity | High (Professional) | Low to Medium (Beginner to Intermediate) | Medium to High (Specialized) | Low to Medium (Beginner to Intermediate) |
| Portability | Low (Desktop/Laptop) | High (Smartphone/Tablet) | Medium (Can be bulky) | High (Web browser) |
| Cost | Medium to High | Free to Low | Medium to Very High | Free to Low (Subscription) |
| Learning Curve | Steep | Gentle to Moderate | Moderate (Specific to device) | Gentle to Moderate |
| Collaboration | Possible (file sharing) | Possible (file sharing/specific apps) | Limited (requires external tools) | Excellent (built-in features) |
| Sound Quality | Professional | Good to Very Good | Excellent (unique character) | Good to Very Good |
| Ideal For | Serious producers, mixing/mastering | On-the-go ideas, beginners, beat making | Live performance, unique sound design | Collaborative projects, quick ideas |
Understanding these distinctions is your first step to choosing the perfect tool for your musical journey. Ready to dive into some specifics? Let’s talk about the software that’s making waves right now!
🎹 Top 10 Best Music Maker Software Programs in 2024
Choosing the “best” music maker software is a bit like choosing the “best” flavor of ice cream – it’s highly subjective and depends entirely on your taste, workflow, and goals. However, based on our collective experience at Make a Song™ and countless hours spent in the studio, we’ve compiled a list of the top 10 DAWs that consistently deliver power, flexibility, and creative inspiration. We’ll give you the lowdown, complete with our ratings and insights!
Our Rating System Explained:
- Design (1-10): User interface aesthetics, intuitiveness, visual appeal.
- Functionality (1-10): Depth of features, recording, editing, mixing capabilities.
- Ease of Use (1-10): How quickly a beginner can get started; workflow efficiency.
- Features (1-10): Included instruments, effects, unique tools, extensibility.
- Value for Money (1-10): Price vs. features, updates, community support.
1. Ableton Live 🚀
Ableton Live isn’t just a DAW; it’s a performance instrument. Renowned for its unique Session View, it’s a favorite among electronic music producers, DJs, and live performers. Its workflow encourages experimentation and improvisation, making it incredibly inspiring.
| Aspect | Rating |
|---|---|
| Design | 9 |
| Functionality | 10 |
| Ease of Use | 7 |
| Features | 10 |
| Value for Money | 9 |
- Features & Benefits:
- Session View: A non-linear grid for launching clips and ideas, perfect for live performance and rapid composition. This is a game-changer for Melody Creation and arrangement.
- Warping Engine: Unmatched audio time-stretching capabilities, allowing you to manipulate tempo and sync samples effortlessly.
- Packed with Instruments & Effects: Comes with a vast array of high-quality synths (Wavetable, Operator, Analog), samplers, and creative audio effects.
- Max for Live Integration: Extends Live’s functionality with custom devices and tools created by a vibrant community.
- Push Controller: Seamless integration with Ableton’s own hardware controller for a hands-on experience.
- Drawbacks:
- Can be intimidating for traditional linear recording artists initially.
- The full suite can be a significant investment.
- Our Take: “Ableton Live changed my entire approach to production,” says our lead beatmaker, Maya. “The way you can just throw ideas into Session View and instantly hear them together… it’s pure magic for getting past creative blocks.”
- User Review Snippet: “Live’s workflow is unparalleled for electronic music. Once you ‘get’ it, you can’t go back.” – Reddit user, r/ableton
- 👉 CHECK PRICE on: Amazon | Sweetwater | Ableton Official Website
2. Logic Pro X 🍎
Exclusive to macOS, Logic Pro X is Apple’s professional-grade DAW, offering incredible value for its feature set. It’s a powerhouse for traditional recording, film scoring, and electronic production, boasting a massive library of sounds and intuitive tools.
| Aspect | Rating |
|---|---|
| Design | 9 |
| Functionality | 9 |
| Ease of Use | 8 |
| Features | 10 |
| Value for Money | 10 |
- Features & Benefits:
- Comprehensive Sound Library: Thousands of loops, samples, and virtual instruments (including Alchemy, a powerful synthesizer).
- Drummer Track: An AI-powered virtual drummer that creates realistic drum parts in various styles.
- Flex Pitch & Flex Time: Advanced tools for pitch correction and time manipulation, rivaling dedicated plugins.
- Intuitive Interface: Familiar layout for those coming from GarageBand, making the transition smooth.
- Professional Mixing Tools: Full suite of high-quality EQs, compressors, reverbs, and more.
- Drawbacks:
- Mac-only, unfortunately for our PC friends.
- Can be resource-intensive on older Macs.
- Our Take: “Logic Pro X is my go-to for songwriting,” says our resident songwriter, Chloe. “The sheer amount of content you get for the price is insane, and the workflow just feels natural for building a song from scratch.”
- User Review Snippet: “For Mac users, Logic is a no-brainer. It’s powerful, stable, and the included instruments are fantastic.” – Macworld Review
- 👉 CHECK PRICE on: Apple App Store | Apple Official Website
3. FL Studio 🍊
A long-standing favorite, especially among hip-hop, EDM, and trap producers, FL Studio (formerly FruityLoops) is known for its pattern-based workflow, powerful step sequencer, and vibrant community. It’s incredibly fast for beat-making and melodic sequencing.
| Aspect | Rating |
|---|---|
| Design | 8 |
| Functionality | 9 |
| Ease of Use | 8 |
| Features | 9 |
| Value for Money | 9 |
- Features & Benefits:
- Pattern-Based Workflow: The Channel Rack and Piano Roll make creating intricate beats and melodies incredibly fast and intuitive.
- Lifetime Free Updates: Once you buy a license, all future updates are free – an amazing value proposition!
- Excellent Stock Plugins: Comes with a wide range of high-quality synthesizers (Sytrus, Harmor, SerumFX) and effects.
- Cross-Platform: Available on Windows and macOS, with a mobile version (FL Studio Mobile).
- Flexible Mixer: A powerful and customizable mixer for professional sound shaping.
- Drawbacks:
- The interface can feel a bit cluttered to newcomers.
- Audio recording and editing, while improved, isn’t as intuitive as some other DAWs.
- Our Take: “FL Studio is where I started making beats,” shares our resident producer, Alex. “The step sequencer is just so immediate. You can go from an idea to a full loop in minutes. It’s perfect for getting those rhythmic ideas out fast.”
- User Review Snippet: “If you make beats, FL Studio is a must-have. The workflow is unmatched for speed and creativity.” – YouTube Commenter
- 👉 CHECK PRICE on: Amazon | Image-Line Official Website
4. Pro Tools 🎤
Often considered the industry standard for professional recording, mixing, and post-production studios. Pro Tools is known for its robust audio editing capabilities, rock-solid stability, and precise control over every aspect of a recording session.
| Aspect | Rating |
|---|---|
| Design | 8 |
| Functionality | 10 |
| Ease of Use | 6 |
| Features | 9 |
| Value for Money | 7 |
- Features & Benefits:
- Unrivaled Audio Editing: Industry-leading tools for precise audio manipulation, perfect for DIY Recording Studio projects.
- Robust Mixing Environment: Professional-grade mixer with extensive routing and automation capabilities.
- Hardware Integration: Seamless integration with Avid’s own audio interfaces and control surfaces.
- Post-Production Powerhouse: Widely used in film, TV, and game audio production.
- Cloud Collaboration: Avid Cloud Collaboration allows for remote teamwork.
- Drawbacks:
- Steep learning curve for beginners.
- Subscription-based pricing can be costly over time.
- Less focused on creative composition tools compared to others.
- Our Take: “When it comes to tracking and mixing a full band, Pro Tools is still king,” says our head engineer, David. “Its stability and editing precision are unmatched, especially for vocal comping and intricate instrument edits.”
- User Review Snippet: “Every major studio runs Pro Tools for a reason. It’s the most reliable DAW for serious audio work.” – Gearspace Forum
- 👉 CHECK PRICE on: Amazon | Sweetwater | Avid Official Website
5. GarageBand 🎸
The little sibling to Logic Pro X, GarageBand is a free, intuitive, and incredibly powerful music maker for macOS and iOS. It’s the perfect starting point for beginners, offering a wealth of loops, virtual instruments, and easy recording features.
| Aspect | Rating |
|---|---|
| Design | 9 |
| Functionality | 7 |
| Ease of Use | 10 |
| Features | 8 |
| Value for Money | 10 |
- Features & Benefits:
- Completely Free: An unbeatable value for the features it offers.
- User-Friendly Interface: Designed for ease of use, making it ideal for absolute beginners.
- Smart Instruments: Play instruments like drums, bass, and guitar without needing musical knowledge.
- Massive Loop Library: Thousands of royalty-free loops to get you started.
- Seamless Upgrade Path: Projects can be easily opened in Logic Pro X for more advanced work.
- Drawbacks:
- Limited mixing and mastering capabilities compared to professional DAWs.
- No third-party VST/AU plugin support (on iOS, limited on macOS).
- Mac/iOS only.
- Our Take: “GarageBand is where I tell everyone to start,” says Chloe. “It’s so intuitive, and you can genuinely make great-sounding demos. My first few tracks that actually sounded ‘good’ were made entirely in GarageBand on my iPad!”
- User Review Snippet: “For a free app, GarageBand is mind-blowing. I’ve made entire songs on my phone with it.” – App Store Review
- 👉 CHECK PRICE on: Apple App Store | Apple Official Website
6. Reaper 💀
Reaper (Rapid Environment for Audio Production, Engineering, and Recording) is a lean, mean, customizable machine. It’s incredibly affordable, yet offers professional-grade features that rival much more expensive DAWs. It’s a favorite among independent producers and those who love to tweak every aspect of their software.
| Aspect | Rating |
|---|---|
| Design | 7 |
| Functionality | 9 |
| Ease of Use | 6 |
| Features | 9 |
| Value for Money | 10 |
- Features & Benefits:
- Unbeatable Price: Extremely affordable license with a generous, fully functional trial period.
- Highly Customizable: Almost every aspect of the interface and workflow can be tailored to your liking.
- Lightweight & Efficient: Runs smoothly on less powerful computers.
- Cross-Platform: Available on Windows, macOS, and Linux.
- Powerful Scripting: Advanced users can extend its functionality with custom scripts.
- Drawbacks:
- Steep learning curve due to its open-ended nature and lack of hand-holding.
- Doesn’t come with a large library of stock instruments or loops (relies on third-party plugins).
- Our Take: “Reaper is the ultimate underdog,” says David. “It might not look as flashy, but under the hood, it’s a beast. If you’re willing to put in the time to customize it, you’ll have a DAW that does exactly what you want, without the bloat.”
- User Review Snippet: “Reaper is the most powerful DAW for the money. Period. It does everything the big boys do, and often better.” – Cockos Forum
- 👉 CHECK PRICE on: Cockos Official Website
7. Studio One 🎤
Presonus Studio One has rapidly gained popularity for its intuitive single-window interface, drag-and-drop workflow, and excellent sound quality. It strikes a great balance between professional features and ease of use, making it a strong contender for both beginners and seasoned pros.
| Aspect | Rating |
|---|---|
| Design | 9 |
| Functionality | 9 |
| Ease of Use | 9 |
| Features | 9 |
| Value for Money | 8 |
- Features & Benefits:
- Single-Window Interface: Keeps everything organized and accessible, reducing clutter.
- Drag-and-Drop Workflow: Extremely intuitive for adding instruments, effects, and samples.
- Integrated Mastering Suite: Includes a dedicated Project Page for mastering your tracks and creating DDP files.
- Chord Track: Helps with Melody Creation and harmonic exploration, automatically detecting and suggesting chords.
- Impact XT & Sample One XT: Powerful drum machine and sampler built-in.
- Drawbacks:
- Stock plugin library, while good, isn’t as extensive as some competitors.
- Some advanced features are locked behind higher-tier versions.
- Our Take: “Studio One is incredibly efficient,” says Maya. “I love how quickly I can go from a blank canvas to a full arrangement. The mastering page is also a huge plus for getting a finished product ready for release.”
- User Review Snippet: “Studio One is a joy to use. It’s powerful enough for pros but easy enough for anyone to pick up.” – Sweetwater Review
- 👉 CHECK PRICE on: Amazon | Sweetwater | PreSonus Official Website
8. Cubase 🎼
Steinberg Cubase is one of the oldest and most mature DAWs on the market, with a rich history in music production, especially in MIDI sequencing and orchestral composition. It’s a deep and powerful tool, favored by many composers and producers for its comprehensive feature set.
| Aspect | Rating |
|---|---|
| Design | 8 |
| Functionality | 9 |
| Ease of Use | 7 |
| Features | 9 |
| Value for Money | 8 |
- Features & Benefits:
- Advanced MIDI Capabilities: Industry-leading MIDI editing, scoring, and expression tools.
- VariAudio: Steinberg’s powerful pitch correction and time warping tool, similar to Melodyne.
- Audio Alignment: Easily align multiple takes of vocals or instruments.
- Control Room: A dedicated monitoring section for professional studio setups.
- Extensive Stock Instruments & Effects: Comes with a wide range of high-quality plugins and virtual instruments.
- Drawbacks:
- Can feel overwhelming due to its vast feature set.
- Dongle (eLicenser) required for some versions, which can be inconvenient.
- Our Take: “Cubase is a workhorse, especially for film scoring and complex arrangements,” notes David. “Its MIDI capabilities are second to none, and VariAudio is a lifesaver for vocal production.”
- User Review Snippet: “If you’re serious about MIDI and orchestral production, Cubase is the way to go. It’s incredibly deep.” – Gearslutz Forum
- 👉 CHECK PRICE on: Amazon | Sweetwater | Steinberg Official Website
9. Bitwig Studio 🤖
Often seen as a modern alternative to Ableton Live, Bitwig Studio offers a highly modular and flexible workflow. Its unique “The Grid” environment allows for incredible sound design and custom device creation, appealing to experimental producers and sound designers.
| Aspect | Rating |
|---|---|
| Design | 9 |
| Functionality | 9 |
| Ease of Use | 7 |
| Features | 10 |
| Value for Money | 8 |
- Features & Benefits:
- Modular Workflow: Every device, instrument, and effect can be nested and modulated, offering unparalleled sound design possibilities.
- The Grid: A powerful modular environment for building your own instruments and effects from scratch.
- Clip Launcher: Similar to Ableton’s Session View, great for live performance and improvisation.
- Sandbox Plugin Hosting: Crashed plugins won’t take down your entire DAW.
- Cross-Platform: Available on Windows, macOS, and Linux.
- Drawbacks:
- Can be complex for beginners due to its modular nature.
- Smaller community and fewer third-party tutorials compared to more established DAWs.
- Our Take: “Bitwig is for the adventurous producer,” says Alex. “If you love to experiment and build your own sounds, The Grid is an absolute playground. It’s like having a modular synth rack inside your DAW!”
- User Review Snippet: “Bitwig’s modularity is addictive. I’ve created sounds I never thought possible.” – Bitwig Forum
- 👉 CHECK PRICE on: Thomann | Bitwig Official Website
10. BandLab 🤝
While often categorized as a mobile app or online platform, BandLab deserves a spot here for its incredible accessibility and growing desktop functionality. It’s a free, cloud-based music maker that integrates social networking, collaboration, and a surprisingly robust set of tools.
| Aspect | Rating |
|---|---|
| Design | 8 |
| Functionality | 7 |
| Ease of Use | 9 |
| Features | 8 |
| Value for Money | 10 |
- Features & Benefits:
- Completely Free: No hidden costs, making it incredibly accessible for everyone.
- Cloud-Based Collaboration: Easy to share projects and collaborate with other musicians globally.
- Massive Sound Library: Thousands of royalty-free loops, samples, and virtual instruments.
- Social Network Integration: Connect with other artists, share your music, and get feedback.
- Mobile & Web Platform: Create music anywhere, anytime.
- Drawbacks:
- Less powerful and feature-rich than dedicated desktop DAWs.
- Relies on an internet connection for full functionality.
- Mixing and mastering tools are more basic.
- Our Take: “BandLab is a fantastic entry point, especially if you’re into collaboration,” says Chloe. “I’ve seen so many aspiring artists get their start here, and the community aspect is really inspiring. It’s a true ‘music maker’ for the people.”
- User Review Snippet: “BandLab is amazing for a free app. I’ve connected with so many talented people and made tracks I’m proud of.” – Google Play Store Review
- 👉 CHECK PRICE on: BandLab Official Website (Free)
A Note on MAGIX Music Maker: You might be wondering about MAGIX Music Maker, especially since we saw a query about moving it to another computer on magix.info. While it’s a popular entry-level DAW, particularly known for its loop-based creation, it didn’t quite make our top 10 for overall professional functionality and flexibility compared to these powerhouses. However, it’s a solid choice for beginners looking for a quick way to assemble tracks with pre-made loops and sounds. The challenge of moving soundpools and instruments, as discussed on magix.info (magix.info), highlights a common issue with many DAWs: managing your asset library is crucial. We’ll touch more on this in our troubleshooting section!
Ultimately, the best music maker for you is the one that sparks your creativity and fits your workflow. Don’t be afraid to try out demos and see what clicks!
🎧 Hardware Music Makers: Synthesizers, Drum Machines, and Controllers
While software DAWs offer incredible power and flexibility, there’s a unique magic to physical hardware. The tactile experience of turning a knob, pressing a pad, or sliding a fader can be incredibly inspiring and often leads to unexpected creative breakthroughs. For us at Make a Song™, hardware isn’t just about nostalgia; it’s about a different kind of workflow, a different connection to the sound.
The Allure of Hardware: Why Go Physical?
- Tactile Control: There’s something undeniably satisfying about hands-on control. It can make sound design feel more intuitive and less like “mouse music.”
- Unique Sound Character: Many analog synthesizers and drum machines have a distinct sonic warmth, grit, or unpredictable quality that software emulations strive to replicate but rarely fully capture.
- Performance-Oriented: Hardware is often designed for live performance, with dedicated controls for immediate manipulation.
- Less Distraction: A dedicated piece of hardware means no email notifications, no social media tabs – just you and the music.
- Reliability: Often more stable in a live setting than a complex computer setup.
Key Categories of Hardware Music Makers
1. Synthesizers 🎹
These are the sound sculptors, capable of creating everything from lush pads and searing leads to deep basses and otherworldly textures. Synthesizers come in various forms:
- Analog Synths: Use analog circuits to generate sound. Known for their warmth, organic feel, and sometimes unpredictable nature.
- Example: Moog Subsequent 37 (a monophonic/duophonic analog synth known for its rich bass and expressive leads).
- Example: Korg Minilogue XD (a polyphonic hybrid analog/digital synth, great for pads, leads, and experimental sounds).
- Digital Synths: Use digital signal processing to create sound. Offer immense versatility, polyphony, and often complex sound engines.
- Example: Roland Fantom Series (workstation synths with vast sound libraries and powerful sequencing).
- Example: Native Instruments Komplete Kontrol S-Series (while primarily a controller, it deeply integrates with NI’s powerful software synths, blurring the lines).
- Modular Synths (Eurorack): A system of individual modules (oscillators, filters, envelopes) that you connect with patch cables to build unique, custom instruments.
- Pros: Infinite sound design possibilities, deeply experimental.
- Cons: Very expensive, steep learning curve, can be overwhelming.
CHECK PRICE for Synthesizers on:
- Moog Subsequent 37: Amazon | Sweetwater | Moog Official Website
- Korg Minilogue XD: Amazon | Guitar Center | Korg Official Website
2. Drum Machines & Samplers 🥁
These are the rhythmic heart of many productions, providing beats, grooves, and percussive textures.
- Drum Machines: Dedicated devices for creating and sequencing drum patterns.
- Example: Roland TR-8S (a modern take on classic Roland drum machines like the 808 and 909, with digital samples and analog modeling).
- Example: Elektron Digitakt (a compact sampler and drum machine with powerful sequencing and sound manipulation).
- Samplers: Devices that record and play back audio snippets (samples). They can be used for drums, melodic phrases, vocal chops, or entire compositions.
- Example: Akai MPC Live II (a standalone production center with a built-in battery, speakers, and powerful sampling/sequencing capabilities).
- Example: Teenage Engineering OP-1 Field (a cult-favorite portable synth, sampler, and sequencer known for its unique workflow and quirky charm).
CHECK PRICE for Drum Machines & Samplers on:
- Roland TR-8S: Amazon | Sweetwater | Roland Official Website
- Akai MPC Live II: Amazon | Guitar Center | Akai Professional Official Website
3. MIDI Controllers 🎚️
MIDI controllers don’t make sound themselves, but they are essential bridges between your physical input and your software or hardware instruments. They send MIDI data (note on/off, velocity, control changes) to trigger sounds.
- MIDI Keyboards: Range from small, portable 25-key controllers to full 88-key weighted piano-style controllers.
- Example: Arturia KeyLab Essential Series (combines keyboard, pads, faders, and knobs for comprehensive DAW control).
- Example: Native Instruments Komplete Kontrol S-Series (deep integration with NI’s Komplete software, with light guides and advanced browsing).
- Pad Controllers: Designed for finger drumming, beat making, and launching clips.
- Example: Akai MPD Series (classic MPC-style pads for tactile beat creation).
- Example: Novation Launchpad (grid-based controller popular with Ableton Live users for launching clips and performing).
- Control Surfaces: Offer faders, knobs, and buttons to control your DAW’s mixer, plugins, and transport functions.
- Example: Behringer X-Touch Compact (motorized faders for hands-on mixing).
CHECK PRICE for MIDI Controllers on:
- Arturia KeyLab Essential: Amazon | Sweetwater | Arturia Official Website
- Native Instruments Komplete Kontrol S-Series: Amazon | Guitar Center | Native Instruments Official Website
Hardware vs. Software: A Quick Comparison
| Feature | Hardware Music Makers | Software Music Makers (DAWs) |
|---|---|---|
| Sound Source | Built-in (analog circuits, digital engines, samples) | Virtual instruments, samples, audio recordings |
| Control | Dedicated physical knobs, buttons, keys, pads | Mouse, keyboard, MIDI controllers (external) |
| Flexibility | Fixed functionality, but often unique character | Highly flexible, endless plugins, customizable workflow |
| Portability | Varies (some compact, some bulky) | High (laptop) |
| Cost | Can be very expensive per unit | Often subscription or one-time purchase, more affordable |
| Learning Curve | Specific to each device | Can be steep for comprehensive DAWs |
| Maintenance | Physical wear and tear, firmware updates | Software updates, compatibility issues |
At Make a Song™, we believe the best setup often involves a hybrid approach. Use the power and versatility of a DAW for arrangement, mixing, and mastering, but incorporate hardware for hands-on sound design, performance, and that undeniable sonic character. It’s about finding the balance that ignites your creativity!
💡 How to Choose the Right Music Maker for Your Style and Skill Level
So, you’ve seen the dazzling array of options, from powerful DAWs to quirky hardware. Now comes the big question: How do you pick the right music maker for you? It can feel like standing in a candy store with too many delicious choices! Don’t fret; we’re here to guide you through the maze. At Make a Song™, we’ve helped countless aspiring artists find their perfect creative companion.
The key is to consider a few crucial factors before you commit. Think of it as dating your future studio partner!
1. Your Skill Level and Experience 🎓
- Absolute Beginner (Never touched a DAW):
- ✅ Look for: User-friendly interfaces, drag-and-drop functionality, large loop libraries, built-in tutorials.
- ❌ Avoid: Overly complex professional DAWs with steep learning curves (e.g., Pro Tools, Bitwig Studio) unless you’re prepared for a significant time investment.
- Recommendations: GarageBand (macOS/iOS), BandLab (web/mobile), FL Studio (for beat-making), MAGIX Music Maker (if you’re into loop-based creation and understand its limitations).
- Intermediate (Some experience, maybe with a simpler tool):
- ✅ Look for: More advanced features, better mixing/mastering tools, good stock plugin libraries, flexibility for different genres.
- ❌ Avoid: Sticking with tools that limit your growth.
- Recommendations: Logic Pro X (macOS), Studio One, Ableton Live Intro/Standard, FL Studio Producer Edition.
- Advanced/Professional (Experienced producer, specific workflow needs):
- ✅ Look for: Industry-standard features, deep customization, robust audio editing, excellent third-party plugin support, specific workflow advantages for your genre.
- ❌ Avoid: Anything that feels like a compromise on features or workflow.
- Recommendations: Ableton Live Suite, Logic Pro X, Pro Tools, Cubase, Bitwig Studio.
2. Your Musical Genre and Style 🎶
Different music makers excel at different things.
- Electronic Music (EDM, Hip-Hop, Trap, Techno):
- ✅ Look for: Strong sequencing, powerful synthesizers, robust sampling, creative effects, intuitive loop/clip launching.
- Recommendations: Ableton Live, FL Studio, Bitwig Studio, Akai MPC Live II (hardware).
- Acoustic/Band Recording (Rock, Folk, Jazz, Pop):
- ✅ Look for: Excellent audio recording and editing capabilities, precise mixing tools, good vocal processing.
- Recommendations: Pro Tools, Logic Pro X, Studio One, Cubase, Reaper.
- Film Scoring/Orchestral/Sound Design:
- ✅ Look for: Advanced MIDI sequencing, robust notation features, large orchestral libraries, powerful sound design tools.
- Recommendations: Cubase, Logic Pro X, Ableton Live, Bitwig Studio.
- Singer-Songwriter/Vocal Production:
- ✅ Look for: Easy vocal recording, good pitch correction, intuitive arrangement, quality reverbs/delays.
- Recommendations: Logic Pro X, GarageBand, Studio One, Pro Tools.
3. Your Budget 💰
This is often the most significant factor. Remember, “free” doesn’t always mean “bad,” and “expensive” doesn’t always mean “best.”
- Free/Low Cost:
- Recommendations: GarageBand, BandLab, Reaper (very affordable license after trial), FL Studio Fruity Edition (entry-level).
- Mid-Range:
- Recommendations: Logic Pro X, Studio One Artist, Ableton Live Intro, FL Studio Producer Edition.
- High-End/Professional:
- Recommendations: Ableton Live Suite, Pro Tools Ultimate, Cubase Pro, Bitwig Studio.
Pro Tip: Many DAWs offer free trials or scaled-down “Intro” or “Artist” versions. Always try before you buy! This is the best way to see if a workflow truly resonates with you.
4. Your Operating System 🖥️
A simple but critical consideration.
- macOS Only: Logic Pro X, GarageBand.
- Windows Only: Historically, FL Studio was Windows-only, but now it’s cross-platform.
- Cross-Platform (Windows & macOS): Ableton Live, FL Studio, Pro Tools, Reaper, Studio One, Cubase, Bitwig Studio.
- Linux Compatible: Reaper, Bitwig Studio.
5. Your Workflow Preference: Linear vs. Non-Linear 🔄
- Linear (Traditional Song Structure): If you prefer building a song from beginning to end, track by track, like a traditional recording studio.
- Recommendations: Pro Tools, Logic Pro X, Studio One, Cubase, Reaper.
- Non-Linear (Loop/Clip Based, Performance-Oriented): If you like to experiment with loops, launch clips, and improvise arrangements.
- Recommendations: Ableton Live, Bitwig Studio, FL Studio (with its pattern-based approach).
6. Community and Learning Resources 🤝
A strong community means more tutorials, tips, and troubleshooting help.
- ✅ Look for: Active forums, abundant YouTube tutorials, online courses, and user groups.
- Recommendations: Most major DAWs (Ableton, Logic, FL Studio, Pro Tools) have massive communities. Reaper also has a very dedicated and helpful user base.
Our Final Advice: Don’t get caught in “analysis paralysis.” Pick one that seems like a good fit, download the demo, and start creating! The most important thing is to start making music. You can always switch or add tools later as your skills and needs evolve. Remember, the best music maker is the one that gets your music made.
🔧 Step-by-Step Guide: Setting Up Your Music Maker Studio at Home
So, you’ve chosen your music maker software (or hardware!), and you’re buzzing with creative energy. Fantastic! Now, let’s get your home studio up and running. You don’t need a million-dollar facility to make great music; a well-thought-out home setup can yield incredible results. At Make a Song™, we’ve built countless home studios, from shoestring budgets to semi-pro setups, and we’re here to share our wisdom.
This guide will walk you through the essentials, ensuring you have a solid foundation for your musical endeavors.
Step 1: Choose Your Space Wisely 🏡
This is often overlooked but crucial. Your room is part of your instrument!
- Quiet is Key: Pick the quietest room in your home. Away from noisy appliances, street traffic, or chatty family members.
- Size & Shape: Rectangular rooms are generally better than square rooms, which can cause problematic standing waves. Avoid rooms with too many hard, reflective surfaces (bare walls, glass).
- Power Outlets: Ensure you have enough accessible power outlets and consider a surge protector for your valuable gear.
- Ventilation: Equipment generates heat, and you’ll be spending hours in there. Good airflow is important.
Step 2: Gather Your Essential Gear 🎛️
Here’s a checklist of what you’ll likely need. Remember, you can start small and expand!
- Computer: Your central hub.
- Desktop or Laptop: Choose based on portability needs.
- Specs: Aim for a fast processor (Intel i5/i7/i9 or AMD Ryzen 5/7/9), at least 16GB RAM (32GB is better for heavy production), and a fast SSD (Solid State Drive) for your operating system and DAW. A separate external SSD for samples and projects is highly recommended.
- Digital Audio Workstation (DAW) Software: (You’ve already picked this, right?)
- Examples: Ableton Live, Logic Pro X, FL Studio, Studio One, Pro Tools, Reaper.
- Audio Interface: Your studio’s brain, connecting microphones/instruments to your computer.
- Function: Converts analog signals to digital for your computer, and digital back to analog for your speakers/headphones. Also provides phantom power for condenser mics.
- Key Features: Number of inputs/outputs, preamps quality, low latency.
- Recommendations: Focusrite Scarlett 2i2 (great for beginners), Universal Audio Volt 276, PreSonus Studio 24c.
- CHECK PRICE for Audio Interfaces on:
- Focusrite Scarlett 2i2: Amazon | Sweetwater | Focusrite Official Website
- Universal Audio Volt 276: Amazon | Guitar Center | Universal Audio Official Website
- Studio Monitors (Speakers): Designed for accurate sound reproduction.
- Function: Give you an uncolored, flat frequency response so you can hear your mix accurately.
- Key Features: Size of woofer (5-8 inches common for home studios), active (powered) vs. passive (requires amplifier).
- Recommendations: KRK Rokit 5 G4, Yamaha HS5, JBL 305P MkII.
- CHECK PRICE for Studio Monitors on:
- KRK Rokit 5 G4: Amazon | Sweetwater | KRK Official Website
- Yamaha HS5: Amazon | Guitar Center | Yamaha Official Website
- Studio Headphones: For critical listening, tracking, and checking mixes.
- Function: Provide an isolated listening environment, useful for tracking vocals without bleed and checking details in your mix.
- Key Features: Closed-back (for tracking) vs. open-back (for mixing), comfort, flat frequency response.
- Recommendations: Audio-Technica ATH-M20x (budget-friendly), Sony MDR-7506 (industry standard), Beyerdynamic DT 770 Pro.
- CHECK PRICE for Studio Headphones on:
- Audio-Technica ATH-M20x: Amazon | Walmart | Audio-Technica Official Website
- Microphone(s): To capture vocals or acoustic instruments.
- Function: Converts sound waves into electrical signals.
- Types: Dynamic (durable, good for loud sources, live vocals), Condenser (sensitive, detailed, good for studio vocals, acoustic instruments).
- Recommendations: Shure SM57/SM58 (dynamic workhorses), Audio-Technica AT2020 (affordable condenser), Rode NT1 (high-quality condenser).
- CHECK PRICE for Microphones on:
- Shure SM58: Amazon | Sweetwater | Shure Official Website
- Audio-Technica AT2020: Amazon | Guitar Center | Audio-Technica Official Website
- Cables: XLR cables for mics, TRS cables for monitors. Don’t skimp on these!
- MIDI Controller (Optional but Recommended): A keyboard or pad controller for playing virtual instruments.
- Recommendations: Akai MPK Mini, Arturia MiniLab.
- CHECK PRICE for MIDI Controllers on:
- Akai MPK Mini: Amazon | Sweetwater | Akai Professional Official Website
Step 3: Connect Everything Up 🔌
Follow these general steps for wiring your studio:
- Power Up: Connect all your gear to power outlets (preferably via a surge protector).
- Audio Interface to Computer: Connect your audio interface to your computer via USB or Thunderbolt.
- Monitors to Audio Interface: Use TRS cables to connect your studio monitors to the main outputs of your audio interface.
- Microphone to Audio Interface: Use an XLR cable to connect your microphone to an input on your audio interface. If it’s a condenser mic, remember to engage phantom power (+48V) on your interface.
- MIDI Controller to Computer/Interface: Connect your MIDI controller via USB to your computer or to the MIDI input of your audio interface.
Step 4: Install and Configure Software 💾
- Install Drivers: Install any necessary drivers for your audio interface. This is crucial for proper operation and low latency.
- Install DAW: Install your chosen music maker software.
- Configure DAW Audio Settings:
- Open your DAW’s preferences/settings.
- Select your audio interface as the input and output device.
- Adjust the buffer size. A smaller buffer size reduces latency (delay between playing and hearing sound) but uses more CPU. Start with a medium setting (e.g., 128 or 256 samples) and adjust as needed. For recording, you want low latency. For mixing, a higher buffer size is fine.
- Configure MIDI Settings: Ensure your DAW recognizes your MIDI controller.
Step 5: Acoustic Treatment (The Secret Sauce) 🤫
This is where many home studios fall short. Even the best gear sounds bad in a poorly treated room.
- What it is: Acoustic treatment involves using panels, bass traps, and diffusers to control reflections and standing waves in your room. It’s not soundproofing (keeping sound in/out), but sound conditioning.
- Why it matters: It helps your monitors provide an accurate representation of your mix, so your music sounds good everywhere, not just in your studio. This is a critical aspect of DIY Recording Studio success.
- Basic Steps:
- Identify Reflection Points: Sit at your mixing position. Have a friend hold a mirror along your side walls. Where you see your monitor speaker in the mirror, that’s a first reflection point.
- Absorbers: Place acoustic panels (foam or mineral wool) at first reflection points on side walls, ceiling, and behind your monitors.
- Bass Traps: Place bass traps in corners to control low-frequency build-up.
- Diffusion (Optional): Diffusers scatter sound, making a room sound larger and more natural. Place them on the rear wall.
- Budget Options: Even blankets, thick curtains, or bookshelves can help absorb some sound.
Step 6: Organize Your Digital Assets 🗂️
Remember that magix.info forum post about moving MAGIX Music Maker and its soundpools? This highlights the importance of good organization!
- Dedicated Drives: Use a separate internal or external SSD for your music projects, samples, and virtual instrument libraries. This keeps your system drive fast and makes backups easier.
- Consistent Folder Structure: Create a logical folder structure for your projects (e.g.,
Music Projects > Artist Name > Song Title > Audio Files,MIDI Files,Mixdowns). - Back Up Regularly: Seriously, back up your work! Cloud services (Google Drive, Dropbox) or external hard drives are your friends. Losing a project is a heartbreaking experience we wouldn’t wish on anyone.
By following these steps, you’ll have a functional and inspiring home music maker studio ready to capture your next big idea. Now, let’s talk about turning those ideas into finished tracks!
🎼 Music Maker Workflow: From Idea to Finished Track
Alright, your studio is set up, your gear is humming, and your creative spirit is soaring! But how do you actually turn that spark of an idea into a polished, finished track? This is where a solid music maker workflow comes into play. At Make a Song™, we’ve refined our processes over years, and while every artist has their unique quirks, there’s a general path that most successful productions follow. Think of it as a roadmap for your musical journey.
The Journey Begins: Idea Generation & Pre-Production 🧠
This is the most exciting, and sometimes most elusive, stage. It’s where the magic starts!
- Capture the Spark (The “Aha!” Moment):
- Melody First? Hum a catchy tune into your phone. Play a riff on your guitar. This is often where Melody Creation truly begins.
- Rhythm First? Tap out a beat on your desk, or program a simple drum loop in your DAW.
- Lyric First? Jot down a compelling phrase, a story, or an emotion. Our Lyric Inspiration category is packed with tips for this!
- Sound First? Play with a new synth patch or sample until something inspires you.
- Tip: Always have a way to quickly record ideas – a voice memo app, a small portable recorder, or a simple DAW template. Don’t let a good idea escape!
- Develop the Core Idea:
- Flesh out that initial spark. If it’s a melody, add some chords. If it’s a beat, add a bassline.
- Sketching: Use your DAW’s loop or session view (like Ableton Live’s Session View) to quickly build up layers and see how different elements interact. Don’t worry about perfection yet.
- Arrangement Outline (Pre-Arrangement):
- Even before you record everything, start thinking about your song’s structure: Intro, Verse 1, Chorus, Verse 2, Chorus, Bridge, Solo, Chorus, Outro. This gives you a blueprint.
- Question: What story are you trying to tell with this structure? How will the energy ebb and flow?
The Build: Recording & Arrangement 🏗️
Now you’re bringing your ideas to life within your music maker.
- Lay Down the Foundation (Rhythm & Harmony):
- Start with your core rhythmic elements – drums, percussion.
- Add harmonic elements – bass, chords (guitar, piano, synth pads).
- Tip: Use a click track (metronome) to ensure everything is in time. You can always remove or replace it later.
- Record Main Instruments & Vocals:
- Record your lead melodies, instrumental solos, and, of course, your vocals.
- Multiple Takes: Don’t be afraid to record several takes. You can always “comp” (compile) the best parts later.
- Punching In/Out: Use your DAW’s punch-in/out features to re-record small sections without redoing the whole take.
- Internal Link: For detailed advice on capturing pristine audio, check out our DIY Recording Studio articles.
- Arrange and Structure:
- Drag and drop your recorded clips and MIDI patterns into your DAW’s arrangement view.
- Build out your song sections according to your outline.
- Dynamics: Think about how the song builds and releases tension. Add or remove elements to create interest.
- Transitions: Use effects, automation, or short fills to smoothly move between sections.
- Question: Does the song feel too long? Too short? Does it keep the listener engaged?
The Polish: Editing, Mixing & Mastering ✨
This is where your track transforms from a collection of sounds into a cohesive, professional-sounding piece of music.
- Editing & Cleanup:
- Quantization: Correct any timing issues in MIDI or audio (use sparingly for a natural feel).
- Noise Reduction: Remove unwanted clicks, pops, hums, or background noise from audio recordings.
- Comping: Select the best parts from multiple takes to create a perfect performance.
- Tuning: Use pitch correction tools (like Auto-Tune or Melodyne) for vocals if needed.
- Tip: Less is often more. Don’t over-edit to the point of losing the human feel.
- Mixing (The Art of Balance):
- Volume & Panning: Balance the loudness of each track and place them in the stereo field (left to right).
- EQ (Equalization): Shape the tone of each instrument, removing muddy frequencies and enhancing clarity.
- Compression: Control the dynamic range of tracks, making loud parts quieter and quiet parts louder for a more consistent sound.
- Time-Based Effects: Add reverb (space), delay (echoes), and chorus (thickening) to create depth and atmosphere.
- Automation: Make elements change over time (volume swells, filter sweeps, panning movements).
- Question: Does every instrument have its own space in the mix? Is the vocal clear and upfront? Does it sound good on different speaker systems?
- Mastering (The Final Shine):
- This is the final stage of audio production, optimizing your mixed track for distribution.
- Loudness: Bring the overall volume up to commercial standards.
- EQ & Compression (Subtle): Apply final, subtle touches to the overall track.
- Limiting: Prevent clipping and ensure maximum loudness without distortion.
- Stereo Widening: Enhance the stereo image if desired.
- Tip: Consider having a fresh pair of ears (or even a professional mastering engineer) handle this stage. It’s easy to lose perspective on your own mix.
The Finish Line: Export & Share 🏁
You’ve done it! Now it’s time to share your creation with the world.
- Export Your Track:
- Render your final mixdown from your DAW.
- File Formats: Export in high-quality formats like WAV or AIFF for archiving and distribution, and MP3 (320kbps) for sharing online.
- Metadata: Add artist name, song title, album art, and other relevant information.
- Share Your Music:
- Upload to streaming platforms (Spotify, Apple Music, etc.) via a distributor (DistroKid, TuneCore).
- Share on social media, SoundCloud, Bandcamp.
- Internal Link: We have a whole section on Copyright and Licensing to ensure your hard work is protected!
This workflow isn’t rigid; it’s a flexible framework. Feel free to jump between stages, experiment, and find what works best for you. The most important thing is to keep creating and enjoying the process!
🎤 Recording Vocals and Instruments with Your Music Maker
You’ve got your music maker set up, your workflow mapped out, and now it’s time for the real fun: capturing live sound! Recording vocals and instruments is where your music truly comes alive, adding that human touch that virtual instruments can’t always replicate. At Make a Song™, we’ve spent countless hours coaxing perfect performances out of microphones and instruments, and we’re here to share our top tips for getting clean, professional-sounding recordings right in your home studio.
The Golden Rule: Garbage In, Garbage Out ❌✅
This is perhaps the most critical principle in recording. If your source sound (the instrument or voice) or your initial recording chain (mic, preamp, interface) is poor, no amount of mixing wizardry can truly fix it. Focus on getting the best possible sound at the source!
Essential Gear for Recording
Before you hit record, make sure you have:
- Microphone(s): As discussed in the setup guide.
- Condenser Mics: Ideal for vocals, acoustic guitar, and anything requiring detail and nuance (e.g., Rode NT1, Audio-Technica AT2020).
- Dynamic Mics: Great for loud sources like guitar amps, drums, and robust vocals (e.g., Shure SM57/SM58).
- Audio Interface: To connect your mic/instrument to your computer.
- XLR Cables: High-quality cables for your microphones.
- Pop Filter: Essential for vocals to prevent “plosives” (harsh ‘P’ and ‘B’ sounds).
- Mic Stand: Sturdy and adjustable.
- Headphones (Closed-Back): Crucial for monitoring without bleed into the microphone.
- Instrument Cables (TRS/TS): For connecting guitars, basses, or line-level instruments directly to your interface.
Recording Vocals: Your Voice, Amplified 🗣️
Recording vocals can be intimidating, but with a few techniques, you’ll be sounding great.
- Mic Placement is Key:
- Distance: Start with the singer about 6-12 inches from the pop filter. Closer adds more bass (proximity effect), further adds more room sound. Experiment!
- Angle: Don’t point the mic directly at the singer’s mouth. Angle it slightly up or down to reduce plosives and sibilance (harsh ‘S’ sounds).
- Pop Filter: Always use one! Place it 1-2 inches from the mic.
- Room Acoustics for Vocals:
- Even in a home studio, try to minimize reflections. Record in a room with soft furnishings (curtains, carpet, couch) or use portable acoustic panels/vocal booths.
- Anecdote: Our producer, Alex, once recorded a stunning vocal in a walk-in closet lined with clothes. “It was surprisingly dead-sounding, in a good way! Don’t underestimate unconventional spaces.”
- Gain Staging:
- Set Input Gain: On your audio interface, adjust the gain knob for your microphone input.
- Target Level: Aim for peaks around -10dB to -6dB on your DAW’s input meter. This leaves plenty of “headroom” to prevent clipping (digital distortion) and allows for flexibility during mixing.
- ❌ Don’t record too hot (too loud)! Digital clipping is irreversible.
- ✅ Record a little quieter than you think you need. You can always boost volume later.
- Monitoring:
- The singer must wear closed-back headphones to hear the backing track without it bleeding into the mic.
- Ensure the headphone mix is comfortable and inspiring for the performer.
- Performance & Multiple Takes:
- Encourage the singer to perform with emotion. A great performance trumps perfect technicality every time.
- Record multiple takes. You’ll thank yourself later when you’re comping the best phrases.
- Tip: Record a “scratch vocal” early in the process to guide instrumentalists, then replace it with the final, polished take.
Recording Instruments: Capturing the Vibe 🎸🥁
Whether it’s an acoustic guitar, an electric bass, or a keyboard, each instrument has its own recording considerations. Our Instrument Tutorials are a great resource for specific techniques!
Acoustic Guitar 🎸
- Mic Placement:
- Sweet Spot: A good starting point is pointing a condenser mic towards where the neck meets the body (around the 12th fret), about 6-12 inches away.
- Experiment: Move the mic closer to the soundhole for more bass, or closer to the bridge for more brightness.
- Two Mics: For a fuller sound, try a second mic placed further back for room ambience, or another condenser pointing at the bridge.
- Playing Technique: Ensure the player is minimizing fret buzz and extraneous noises.
Electric Guitar/Bass (DI vs. Amp) ⚡
- DI (Direct Input):
- Connect your guitar/bass directly into your audio interface’s instrument (Hi-Z) input.
- Benefit: Clean signal for re-amping later (running it through amp simulation plugins) and easy to get a consistent tone.
- Tip: Record a DI track even if you’re miking an amp. It’s a lifesaver if you want to change the amp tone later.
- Miking an Amp:
- Mic Type: A dynamic mic like a Shure SM57 is a classic choice.
- Placement: Start with the mic 1-2 inches from the speaker cone, angled slightly off-center.
- Experiment: Closer to the center for brighter, more aggressive tones; closer to the edge for warmer, rounder tones. Further back for more room sound.
- Tone is in the Hands: Remind the player that their technique, choice of guitar, and amp settings are paramount before recording.
Keyboards & Synths 🎹
- Line Out: Most modern keyboards and synthesizers have line outputs (1/4″ TS or TRS). Connect these directly to the line inputs on your audio interface.
- Stereo vs. Mono: If your synth has stereo outputs and you want a wide sound, record both left and right channels to two separate mono tracks in your DAW, then pan them appropriately.
- MIDI Recording: For virtual instruments, record the MIDI performance first. This allows you to change the sound, correct notes, or quantize timing later without re-recording.
General Recording Tips for All Instruments
- Check Your Levels (Again!): Always do a sound check before recording. Have the performer play/sing their loudest part to ensure no clipping.
- Minimize Noise: Turn off air conditioners, refrigerators, and anything else that creates background hum. Unplug phones.
- Tune Up: Always, always, always tune your instruments before recording. Even slightly out-of-tune instruments can ruin a great take.
- Label Your Tracks: Name your tracks clearly (e.g., “Lead Vocal,” “Acoustic Guitar L,” “Bass DI”). This saves immense time during mixing.
- Save Regularly: Hit that save button! Or ensure your DAW’s auto-save is enabled.
By paying attention to these details, you’ll be well on your way to capturing high-quality audio that forms the backbone of a professional-sounding track. Next up: turning those raw recordings into a polished masterpiece through mixing and mastering!
🎚️ Mixing and Mastering Tips for Music Makers: Pro Secrets
You’ve captured your brilliant performances, arranged your masterpiece, and now it’s time for the final, crucial stages: mixing and mastering. This is where your individual tracks transform into a cohesive, impactful song that sounds great on any playback system. At Make a Song™, we consider mixing and mastering an art form in itself, requiring both technical skill and a keen ear. Let’s unlock some pro secrets!
The Art of Mixing: Blending Your Sonic Palette 🎨
Mixing is about balancing all the elements of your song – volumes, frequencies, dynamics, and spatial placement – to create a clear, powerful, and emotionally resonant listening experience.
1. Start with a Clean Slate (and a Good Reference!) ✅
- Organize and Clean: Before you even touch a fader, ensure your tracks are named, organized, and free of unwanted noise or clicks. Delete unused takes.
- Gain Staging: Adjust the gain of each track so that they’re not clipping, but also not too quiet. Aim for peaks around -18dB to -12dB for individual tracks. This leaves plenty of headroom for processing.
- Reference Tracks: Always have a few commercially released songs in your genre that you love the sound of. Listen to them frequently to calibrate your ears and compare your mix. This is a non-negotiable for us!
2. Volume & Panning: The Foundation of Space 📏
- Volume First: Start by setting rough volume levels for all tracks. Get a good balance between drums, bass, instruments, and vocals. The vocal usually sits prominently in the mix.
- Panning: Use panning (left/right placement) to create width and separate instruments in the stereo field.
- ✅ Center: Kick, Snare, Bass, Lead Vocal (usually).
- ✅ Wider: Guitars, synths, backing vocals, percussion.
- ❌ Don’t pan everything hard left/right. Create interesting pockets in between.
3. EQ (Equalization): Sculpting Frequencies ✂️
EQ is your most powerful tool for clarity. It allows you to boost or cut specific frequencies.
- Subtractive EQ First: Often, the best EQ moves are cuts, not boosts. Remove muddy low-mids, harsh highs, or resonant frequencies that clash with other instruments.
- Example: Cut some low-end from guitars to make room for the bass and kick drum.
- Example: Cut harsh frequencies from vocals to make them smoother.
- Boost Sparingly: Only boost frequencies if a track needs more presence or sparkle after cuts have been made.
- Context is King: EQ each instrument in the context of the full mix, not in solo.
4. Compression: Taming Dynamics & Adding Punch 💪
Compressors reduce the dynamic range of a signal, making the loud parts quieter and the quiet parts louder, resulting in a more consistent sound.
- Vocals: Essential for keeping vocals upfront and consistent.
- Drums: Can add punch to kicks and snares, or glue a drum bus together.
- Bass: Helps keep the bassline solid and even.
- Key Parameters:
- Threshold: The level at which compression begins.
- Ratio: How much compression is applied (e.g., 4:1 means for every 4dB over the threshold, only 1dB comes out).
- Attack: How quickly the compressor reacts.
- Release: How quickly the compressor stops compressing.
- Tip: Use your ears! A good compressor should make the track sound more solid without sounding “squashed.”
5. Time-Based Effects: Creating Space & Depth 🌌
Reverb, delay, and chorus add dimension and atmosphere.
- Reverb: Simulates acoustic spaces (rooms, halls, plates). Use sends/returns for reverb so multiple tracks can share the same reverb, creating a cohesive space.
- ❌ Don’t drown everything in reverb. Use it to create depth, not mud.
- Delay: Creates echoes. Can add rhythmic interest or simply fill out a sound.
- Chorus/Flanger/Phaser: Add width, movement, and thickness to sounds.
6. Automation: Bringing Your Mix to Life 🤖
Automation allows you to program changes in volume, panning, effects, and other parameters over time.
- Volume Rides: Subtle volume changes can highlight important phrases or tuck instruments back into the mix.
- Effect Throws: Automate a delay or reverb send on a vocal phrase for a dramatic effect.
- Filter Sweeps: Create tension and release with automated filter cutoffs on synths or drums.
The Art of Mastering: The Final Polish ✨
Mastering is the final step, preparing your mixed track for distribution. It’s about optimizing the overall loudness, clarity, and stereo image, ensuring it sounds consistent across all listening platforms.
1. The Mastering Chain (Typical Order)
While every mastering engineer has their secret sauce, a common chain includes:
- EQ: Subtle corrective or enhancement EQ to the overall mix.
- Multiband Compression: Compresses specific frequency ranges independently, allowing you to control dynamics more precisely (e.g., tame a boomy bass without squashing the highs).
- Stereo Imager: Adjusts the width of the stereo field.
- Limiter: The most crucial tool for achieving commercial loudness without clipping. It acts as a brick wall, preventing the signal from exceeding a certain level.
2. Loudness Standards (LUFS) 🔊
- LUFS (Loudness Units Full Scale): This is the modern standard for measuring perceived loudness. Streaming services (Spotify, Apple Music, YouTube) normalize tracks to specific LUFS targets.
- Target Levels:
- Spotify/Apple Music: Around -14 LUFS integrated.
- YouTube: Around -13 LUFS integrated.
- CD/Traditional: Can be louder, around -9 to -6 LUFS.
- Tip: Don’t try to make your track too loud. If you push it too hard, streaming services will turn it down anyway, and it will sound worse. Aim for a healthy loudness with good dynamics.
3. Dithering & Sample Rate Conversion 🔄
- Dithering: When reducing the bit depth (e.g., from 24-bit to 16-bit for CD), dithering adds a small amount of random noise to mask quantization errors, making the sound smoother.
- Sample Rate Conversion: If your project was mixed at a higher sample rate (e.g., 48kHz or 96kHz) and you need to export for a lower rate (e.g., 44.1kHz for CD), use a high-quality sample rate converter.
4. Critical Listening & A/B Testing 🎧
- Listen Everywhere: Check your master on various systems: studio monitors, headphones, car stereo, phone speakers, Bluetooth speakers.
- A/B Test: Constantly compare your master to your reference tracks. Does it have similar loudness, clarity, and impact?
- Take Breaks: Your ears get fatigued. Step away for 15-30 minutes, then come back with fresh ears. This is a game-changer!
Our Expert Recommendation: While you can certainly learn to mix and master your own music (and we encourage it!), for truly professional results, consider hiring a dedicated mastering engineer. They have specialized gear, acoustically treated rooms, and, most importantly, fresh, objective ears. It’s often the best investment you can make for your music.
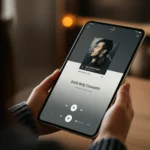
📱 Mobile Music Makers: Creating Hits on Your Phone or Tablet
Who needs a fancy studio when you’ve got a supercomputer in your pocket? That’s right, your smartphone or tablet isn’t just for scrolling social media or playing games; it’s a powerful mobile music maker! At Make a Song™, we’ve seen firsthand how these portable powerhouses have democratized music production, allowing artists to capture inspiration whenever and wherever it strikes.
The Rise of the Pocket Studio 🚀
The idea of making music on a mobile device might have seemed like a gimmick a decade ago, but today, mobile DAWs and specialized apps are incredibly sophisticated. They offer robust features, intuitive interfaces, and often integrate seamlessly with desktop workflows.
Why Go Mobile? The Benefits of Portable Production
- Instant Inspiration Capture: Got a melody humming in your head on the bus? A beat idea while waiting for coffee? Pull out your phone and lay it down immediately. This is invaluable for Melody Creation and quick beat sketching.
- Unmatched Portability: Your studio fits in your backpack, or even your pocket! Make music on a plane, in a park, or during your lunch break.
- Intuitive Touch Interfaces: Many apps are designed specifically for touch, making them incredibly hands-on and fun to use.
- Affordability: Many excellent mobile music makers are free or cost significantly less than desktop software.
- Low Barrier to Entry: Perfect for beginners who want to dip their toes into music production without a huge investment in gear.
Top Mobile Music Maker Apps We Love ❤️
While the app stores are flooded with options, here are some of our team’s favorites that consistently deliver:
1. GarageBand (iOS) 🍏
- Overview: Apple’s free, intuitive, and surprisingly powerful DAW for iPhone and iPad. It’s the perfect entry point for iOS users.
- Features: Multi-track recording, vast loop library, Smart Instruments (play chords/beats without musical knowledge), virtual instruments (keyboards, drums, guitars), audio recorder, basic mixing. Projects can be seamlessly transferred to Logic Pro X.
- Our Take: “GarageBand on my iPad is my go-to for sketching out song ideas,” says Chloe. “I once wrote an entire chorus on a train using just the Smart Drums and a virtual piano. It’s incredibly inspiring for quick Lyric Inspiration and melody building.”
- 👉 CHECK PRICE on: Apple App Store (Free)
2. FL Studio Mobile (iOS, Android, ChromeOS) 🍊
- Overview: A comprehensive mobile version of the popular desktop DAW, FL Studio. It brings many of the desktop’s core features to your mobile device.
- Features: Step sequencer, piano roll, multi-track audio recording, a wide range of virtual instruments (synths, samplers, drum kits), effects, MIDI controller support, and project compatibility with the desktop version.
- Our Take: “If you’re an FL Studio desktop user, the mobile version is a no-brainer,” says Alex. “The workflow feels familiar, and you can start a beat on your phone and finish it on your computer. It’s a true extension of your studio.”
- 👉 CHECK PRICE on: Apple App Store | Google Play Store | Image-Line Official Website
3. BandLab (iOS, Android, Web) 🤝
- Overview: A free, cloud-based music maker that doubles as a social music platform. It’s fantastic for collaboration and sharing.
- Features: Multi-track Mix Editor, thousands of royalty-free loops and samples, virtual instruments, guitar/bass amp simulators, vocal effects, built-in mastering, and a thriving community for sharing and collaborating.
- Our Take: “BandLab is amazing for connecting with other musicians,” says Maya. “I’ve collaborated on tracks with people I’ve never met in person, all within the app. It’s a true community ‘music maker’.”
- 👉 CHECK PRICE on: Apple App Store | Google Play Store | BandLab Official Website (Free)
4. Koala Sampler (iOS, Android) 🐨
- Overview: A super fun, intuitive, and powerful sampler app that’s perfect for beat-making, finger drumming, and creative sound manipulation.
- Features: Record samples from mic or import, chop, sequence, add effects, perform live, export loops or full songs. It’s designed for immediate gratification.
- Our Take: “Koala Sampler is pure joy,” exclaims Alex. “It’s so immediate for grabbing sounds around you and turning them into beats. I’ve made entire tracks just sampling household objects and my own voice!”
- 👉 CHECK PRICE on: Apple App Store | Google Play Store
5. Korg Gadget (iOS, macOS) 🎶
- Overview: A collection of virtual synthesizers and drum machines (“gadgets”) integrated into a powerful mobile DAW. Known for its high-quality sounds and inspiring workflow.
- Features: Over 40 different gadgets (synths, drum machines, samplers), intuitive sequencing, mixing, and export options.
- Our Take: “Korg Gadget is like having a whole rack of Korg synths in your pocket,” says David. “The sound quality is incredible, and it’s fantastic for electronic music production on the go.”
- 👉 CHECK PRICE on: Apple App Store | Korg Official Website
Limitations of Mobile Music Makers 🚧
While powerful, mobile apps do have some drawbacks compared to full desktop DAWs:
- Processing Power: Mobile devices have less CPU and RAM, limiting track counts, complex effects, and virtual instruments.
- Screen Size: Detailed editing, mixing, and automation can be fiddly on a small screen.
- Connectivity: While some interfaces work, connecting multiple mics or complex MIDI setups can be challenging.
- Plugin Ecosystem: Generally, mobile apps have a more closed ecosystem of built-in instruments and effects, with less third-party plugin support.
Making the Most of Your Mobile Studio
- Start Ideas: Use mobile apps to quickly capture ideas, sketch out beats, or record vocal memos.
- Finish Demos: Many artists create full, high-quality demos entirely on their mobile devices.
- Hybrid Workflow: Start a project on mobile, then transfer it to your desktop DAW for advanced mixing and mastering.
- External Gear: Enhance your mobile setup with a small audio interface (like an iRig), a portable MIDI keyboard, or even a USB microphone.
Mobile music makers are a testament to how far technology has come, putting creative power directly into the hands of millions. So, next time you’re waiting in line, why not make a beat instead of scrolling? You might just create your next hit!
🌐 Collaborating Online: Using Cloud-Based Music Makers and Platforms
The days of mailing tapes or even emailing huge project files back and forth are, thankfully, long gone! In our interconnected world, online collaboration has become a game-changer for musicians. At Make a Song™, we’ve worked on countless projects with artists from different cities, countries, and even continents, all thanks to the power of cloud-based music makers and collaboration platforms. It’s an incredible way to expand your network, share ideas, and create music you might never have imagined on your own.
The Power of Remote Teamwork 🤝
Why collaborate online?
- Access to Diverse Talent: Work with a guitarist in Nashville, a drummer in London, or a vocalist in Tokyo without leaving your home studio.
- Fresh Perspectives: Get new ideas and insights that can elevate your music.
- Skill Sharing: Learn from others and contribute your unique strengths.
- Networking: Build relationships with other musicians and producers.
- Efficiency: Streamlined workflows for sharing files and tracking progress.
Key Features of Online Collaboration Platforms
Most effective online music collaboration tools offer a combination of these features:
- Cloud Storage: Securely store project files, audio, and MIDI in the cloud.
- Version Control: Track changes, revert to previous versions, and see who did what.
- Real-time Editing/Comments: Some platforms allow multiple users to work on a project simultaneously or leave time-stamped comments.
- Communication Tools: Built-in chat, video conferencing, or comment sections.
- Asset Management: Organize samples, loops, and virtual instruments.
- Integrated DAW-like Features: Many platforms offer their own web-based DAWs for basic editing and arrangement.
Top Cloud-Based Music Makers and Platforms for Collaboration
Here are some of our go-to platforms for online music collaboration:
1. BandLab 🎶 (Web & Mobile)
- Overview: We’ve mentioned BandLab before, and it truly shines as a collaboration hub. It’s a free, comprehensive platform that combines a multi-track DAW with a social network for musicians.
- Collaboration Features:
- Forking: Users can “fork” (copy) a public project, add their contribution, and then suggest it back to the original creator.
- Real-time Collaboration: Invite friends to a private project and work together in the Mix Editor.
- Messaging & Comments: Built-in chat and comment sections for communication.
- Version History: Track all changes made to a project.
- Our Take: “BandLab is the easiest entry point for online collaboration, hands down,” says Maya. “The social aspect makes it really engaging, and I’ve seen some incredible tracks come out of its community. It’s perfect for finding new collaborators.”
- 👉 CHECK PRICE on: BandLab Official Website (Free)
2. Splice Studio 🎛️ (Desktop Integration)
- Overview: While Splice is famous for its massive sample library, Splice Studio offers cloud-based project backup and version control for popular desktop DAWs.
- Collaboration Features:
- DAW Integration: Syncs directly with Ableton Live, Logic Pro X, FL Studio, Studio One, and GarageBand.
- Automatic Backup: Automatically backs up your project files to the cloud as you work.
- Version History: Easily revert to any previous version of your project.
- Comments: Leave comments on specific versions for feedback.
- Our Take: “Splice Studio is a lifesaver for managing projects with multiple collaborators using different DAWs,” says David. “The automatic version control means I never have to worry about losing work or overwriting someone else’s changes. It’s like GitHub for music!”
- 👉 CHECK PRICE on: Splice Official Website (Subscription-based, often bundled with Splice Sounds)
3. Soundtrap (Web & Mobile) 🎧
- Overview: Owned by Spotify, Soundtrap is a user-friendly, browser-based DAW designed specifically for collaborative music and podcast creation.
- Collaboration Features:
- Real-time Collaboration: Multiple users can edit the same project simultaneously, seeing each other’s changes in real-time.
- Video Chat: Built-in video chat for direct communication within the project.
- Extensive Sound Library: Thousands of loops, instruments, and effects.
- Our Take: “Soundtrap is fantastic for educational settings or for quick, casual collaborations,” notes Chloe. “The real-time editing is incredibly powerful, and the interface is very approachable for beginners.”
- 👉 CHECK PRICE on: Soundtrap Official Website (Free tier available, subscription for premium features)
4. Google Drive / Dropbox / OneDrive (File Sharing) ☁️
- Overview: While not dedicated music makers, general cloud storage services are often used for simpler file sharing in collaborative projects.
- Collaboration Features:
- File Syncing: Keep project folders synced across multiple computers.
- Version History: Most offer some form of file versioning.
- Shared Folders: Easily share specific folders with collaborators.
- Our Take: “For smaller projects or just sharing stems, a simple shared Google Drive folder works wonders,” says Alex. “It’s not as integrated as Splice, but it’s universally accessible and gets the job done for basic file exchange.”
- 👉 CHECK PRICE on: Google Drive (Free tier available) | Dropbox (Free tier available)
Challenges of Online Collaboration (and How to Overcome Them) 🚧
Even with great tools, online collaboration has its quirks:
- Communication is Key: Misunderstandings can easily arise. Be clear, concise, and communicate frequently. Use video calls when possible.
- Time Zones: Coordinating real-time sessions can be tricky across different time zones. Embrace asynchronous workflows.
- File Management: Agree on naming conventions for files (e.g., “SongTitle_Instrument_Version_ArtistName.wav”) and stick to them.
- Latency: Real-time recording together over the internet is still challenging due to latency. It’s usually better to record parts individually and then share.
- Creative Differences: Be open to feedback and compromise. Remember, you’re building something together!
Online collaboration has opened up a world of possibilities for music makers. It’s a powerful tool for learning, growing, and creating music that transcends geographical boundaries. So, don’t be shy – reach out and connect with other artists!
💾 Exporting and Sharing Your Music: Formats, Platforms, and Best Practices
You’ve poured your heart and soul into your music, meticulously crafting every beat, melody, and lyric. The mix is perfect, the master is gleaming, and now it’s time for the grand finale: exporting and sharing your music with the world! This isn’t just a technical step; it’s the bridge between your studio and your audience. At Make a Song™, we know that getting this right is crucial for your music to sound its best and reach the ears it deserves.
The Export Process: Getting Your Files Ready 📤
Exporting (or “rendering” or “bouncing”) is the process of turning your DAW project into a single audio file.
- Final Checks in Your DAW:
- Master Bus: Ensure there are no clipping indicators on your master bus.
- Automation: Double-check all volume, pan, and effect automation.
- Start/End Points: Make sure your song starts and ends precisely where you want it, with no dead air or abrupt cuts.
- Plugins: Ensure all plugins are enabled and working correctly.
- Export Settings (Crucial Decisions!):
- File Format:
- WAV (Waveform Audio File Format): This is the gold standard for uncompressed, high-quality audio. Always export your final master as a WAV file.
- Bit Depth: 24-bit (for archiving, distribution to streaming services) or 16-bit (for CD burning, if still relevant).
- Sample Rate: Match your project’s sample rate (e.g., 44.1 kHz, 48 kHz, 96 kHz). 44.1 kHz is standard for music.
- AIFF (Audio Interchange File Format): Apple’s equivalent to WAV, also uncompressed and high-quality.
- MP3 (MPEG-1 Audio Layer 3): A lossy compressed format ideal for sharing online, email, or quick previews.
- Bitrate: Use 320 kbps for the highest quality MP3. Lower bitrates (e.g., 128 kbps) are for very small files but sound noticeably worse.
- FLAC (Free Lossless Audio Codec): A lossless compressed format that’s smaller than WAV but retains all audio information. Great for audiophiles and some distribution platforms.
- WAV (Waveform Audio File Format): This is the gold standard for uncompressed, high-quality audio. Always export your final master as a WAV file.
- Stereo Interleaved: Export as a single stereo file, not separate left and right mono files.
- Normalize: Generally, ❌ do not normalize during export if you’ve already mastered your track. Normalization can undo your careful loudness balancing.
- Dithering: If you’re reducing the bit depth (e.g., 24-bit to 16-bit), ✅ enable dithering to minimize quantization noise.
- File Format:
Metadata: The Invisible Information 🏷️
Don’t forget to embed metadata into your audio files, especially MP3s. This includes:
- Artist Name
- Song Title
- Album Name
- Genre
- Year
- Album Art
- Composer/Producer
- Copyright Information: This is where our Copyright and Licensing knowledge comes in handy! Ensure your rights are properly attributed.
Platforms for Sharing Your Music 🌐
Once your files are perfectly exported, it’s time to get them out there!
1. Digital Distribution Services (for Streaming & Sales) 📈
These services get your music onto major platforms like Spotify, Apple Music, Amazon Music, YouTube Music, Tidal, and more.
- DistroKid: Popular for its unlimited uploads for a yearly fee. Fast and user-friendly.
- TuneCore: Offers various plans, allowing you to keep 100% of your royalties.
- CD Baby: Known for its one-time fee per release and physical distribution options.
- Amuse: Offers a free tier for basic distribution.
CHECK OUT these Distributors:
- DistroKid: DistroKid Official Website
- TuneCore: TuneCore Official Website
- CD Baby: CD Baby Official Website
2. Direct-to-Fan Platforms (for Sales & Community) 💖
These platforms allow you to sell your music directly to fans and build a community.
- Bandcamp: A favorite among independent artists. You set your prices, offer digital and physical merch, and keep a large percentage of sales. Great for building a direct relationship with your audience.
- SoundCloud: While also a streaming platform, its free tier and direct upload make it excellent for sharing demos, works-in-progress, and building an early following.
CHECK OUT these Platforms:
- Bandcamp: Bandcamp Official Website
- SoundCloud: SoundCloud Official Website
3. Social Media & Video Platforms (for Promotion & Engagement) 📣
- YouTube: Essential for music videos, lyric videos, visualizers, and even behind-the-scenes content. A massive discovery platform.
- Instagram/TikTok: Short-form video is king for viral moments and reaching new audiences. Create engaging snippets of your music.
- Facebook/X (formerly Twitter): Share updates, links, and engage with your fanbase.
Best Practices for Sharing Your Music 🌟
- High-Quality First: Always upload the highest quality file (WAV or FLAC) to your distributor. They will handle the conversion to various streaming formats.
- Engaging Visuals: Don’t underestimate the power of good album art, a compelling music video, or eye-catching social media graphics.
- Tell Your Story: When sharing, provide context. What inspired the song? What was the creative process like? People connect with stories.
- Engage with Your Audience: Respond to comments, thank listeners, and build a community around your music.
- Consistency: Regularly release new music and content to keep your audience engaged and grow your fanbase.
- Understand Copyright: Before you share, ensure you understand the basics of Copyright and Licensing to protect your intellectual property. This includes understanding mechanical licenses for covers, and performance rights for your original works.
Exporting and sharing your music is the culmination of your hard work. Do it right, and your music will shine, reaching listeners far and wide. Now that you know how to get your music out there, let’s talk about how you might even earn a living from it!
💰 Monetizing Your Music Made with Music Makers: Tips and Strategies
You’ve poured your heart, soul, and countless hours into creating your music with your chosen music maker. Now, the big question: Can you actually make money from it? The answer, unequivocally, is yes! While the music industry has changed dramatically, the opportunities for independent artists to monetize their creations are more abundant than ever. At Make a Song™, we believe every artist deserves to be compensated for their work, and we’re here to guide you through the various avenues for turning your passion into profit.
The Modern Music Economy: A Multi-Stream Approach 🌊
Gone are the days when a record deal was the only path to earning money. Today, artists thrive by diversifying their income streams. Think of it like building a sturdy financial boat with many sails!
1. Streaming Royalties 🎧
This is often the first thing people think of. When your music is played on platforms like Spotify, Apple Music, Amazon Music, and YouTube Music, you earn royalties.
- How it Works: You need a digital distributor (DistroKid, TuneCore, CD Baby) to get your music onto these platforms. They collect royalties on your behalf.
- Types of Royalties:
- Mechanical Royalties: Paid to the songwriter/publisher for the reproduction of a song.
- Performance Royalties: Paid to the songwriter/publisher and the performing artist for public performances (radio, TV, streaming).
- Sound Recording Royalties: Paid to the owner of the master recording (usually the artist/label).
- Tip: Register with a Performing Rights Organization (PRO) like ASCAP or BMI (in the US) or PRS for Music (UK) to collect your performance royalties as a songwriter/publisher. For sound recording royalties, use a service like SoundExchange.
- Reality Check: Streaming royalties per play are very small. You need a high volume of streams to earn significant income.
2. Direct Sales to Fans 💖
This is often the most profitable avenue per sale, as you keep a larger percentage.
- Bandcamp: Our top recommendation for direct sales. You can sell digital downloads (WAV, FLAC, MP3), physical merchandise (CDs, vinyl, cassettes), and even offer “name your price” options.
- Your Own Website: If you have an e-commerce store on your personal artist website, you can sell directly and keep 100% of the revenue (minus processing fees).
- Tip: Build a strong relationship with your fanbase. Offer exclusive content, bundles, or limited editions to encourage direct purchases.
3. Sync Licensing (Synchronization) 🎬
This is a fantastic way to earn significant upfront fees and royalties. Sync licensing is when your music is used in visual media.
- What it is: Licensing your music for use in films, TV shows, commercials, video games, podcasts, or online videos.
- How it Works: You can pitch your music directly to music supervisors, work with a sync licensing agency (e.g., Musicbed, Artlist, Marmoset), or use platforms that connect artists with media creators.
- Tip: Create instrumental versions of your tracks. Often, supervisors prefer instrumentals to avoid vocal clashes. Ensure your music is well-mixed and mastered.
4. Selling Beats, Samples, and Sound Packs 🎛️
If you’re a producer or sound designer, your creations can be valuable assets for other music makers.
- Beat Selling: Platforms like BeatStars and Airbit allow you to upload your beats and license them to rappers and vocalists.
- Sample Packs: Create collections of drum sounds, synth loops, vocal chops, or unique sound effects and sell them on platforms like Splice Sounds, Loopmasters, or your own website.
- Tip: Focus on high-quality, unique sounds. Build a reputation for excellent sound design.
5. Live Performances & Merch 🎤👕
While digital is dominant, live music and physical merchandise remain powerful income streams.
- Gigs: Play live shows (virtual or in-person), busk, or perform at open mic nights.
- Merchandise: Sell T-shirts, hats, stickers, physical albums, or other branded items at shows or through your online store.
- Tip: Live performances are not just about money; they’re about connecting with fans and building your brand.
6. YouTube Content Creation 🎥
If you create music videos, tutorials, or behind-the-scenes content, YouTube can be a source of ad revenue.
- YouTube Partner Program: Once you meet certain criteria (subscribers, watch hours), you can monetize your videos with ads.
- Tip: Consistency is key. Create engaging content that resonates with your audience.
7. Patreon & Fan Subscriptions 🤝
- Patreon: Allows fans to directly support artists through monthly subscriptions, offering exclusive content, early access, or personalized interactions in return.
- Tip: Offer tiered rewards that provide real value to your most dedicated fans.
Protecting Your Music & Rights (Crucial!) 🛡️
Before you monetize, ensure your music is protected. Our Copyright and Licensing section is a must-read!
- Copyright: Your music is automatically copyrighted upon creation, but registering it with your country’s copyright office (e.g., US Copyright Office) provides stronger legal protection.
- PROs: Register your songs with a Performing Rights Organization (ASCAP, BMI, PRS for Music) to collect performance royalties.
- SoundExchange: Collects digital performance royalties for sound recordings.
- Metadata: Ensure all your exported files have correct metadata (artist, title, ISRC codes, etc.).
Monetizing your music is a marathon, not a sprint. It requires patience, persistence, and a willingness to learn about the business side of music. But with the right strategies and your incredible music made with your music maker, you absolutely can build a sustainable career doing what you love!
🛠️ Troubleshooting Common Issues with Music Makers
Ah, the joys of technology! While modern music makers are incredibly powerful, they’re not immune to the occasional hiccup. From mysterious crackles to software crashes, troubleshooting is an inevitable part of the production journey. At Make a Song™, we’ve faced every conceivable technical glitch, and we’ve learned that a systematic approach can save you hours of frustration. Don’t throw your computer out the window just yet! Let’s tackle some common issues.
1. Latency (Delay Between Input and Output) ⏰
This is perhaps the most common and frustrating issue for home studio users. You play a note, and there’s a noticeable delay before you hear it.
- Cause: Your computer’s CPU is taking too long to process the audio.
- Solution:
- Reduce Buffer Size: In your DAW’s audio preferences, lower the buffer size (e.g., from 512 to 128 or 64 samples). Smaller buffer = less latency, but more CPU strain.
- Increase Sample Rate: Sometimes, a higher sample rate (e.g., 48kHz instead of 44.1kHz) can help, but this also increases CPU load.
- Use Proper Drivers: Ensure you’re using the correct, up-to-date ASIO drivers (Windows) or Core Audio drivers (macOS) for your audio interface. Generic drivers often have high latency.
- Close Other Apps: Shut down web browsers, games, and other programs that consume CPU.
- Freeze/Bounce Tracks: If you have many virtual instruments or effects, “freeze” or “bounce” those tracks to audio. This frees up CPU by turning them into static audio files.
- Upgrade Hardware: More RAM or a faster processor can significantly reduce latency issues.
2. Crackles, Pops, and Dropouts 💥
These audio artifacts are usually a sign that your system can’t keep up.
- Cause: CPU overload, incorrect buffer size, driver issues, or faulty cables.
- Solution:
- Increase Buffer Size: If lowering the buffer size caused crackles, try increasing it. Find the sweet spot.
- Check Drivers: Reinstall or update your audio interface drivers.
- Check Cables: Faulty or loose cables can cause intermittent crackles. Wiggle them gently to see if the sound changes.
- Disable Wi-Fi/Bluetooth: Temporarily disable these during recording/mixing, as they can sometimes interfere with audio processing.
- Optimize Your OS: For Windows, ensure your power plan is set to “High Performance.” For both, disable unnecessary background processes.
- Check CPU Usage: Monitor your DAW’s CPU meter. If it’s constantly maxed out, you need to optimize your project or hardware.
3. No Sound or Incorrect Input/Output 🔇
The classic “I can’t hear anything!” or “My mic isn’t working!” scenario.
- Cause: Incorrect audio device selection, muted tracks, faulty connections.
- Solution:
- Check DAW Preferences: In your DAW’s audio settings, ensure your audio interface is selected as both the input and output device.
- Check Master Volume: Is your master fader up? Are your speakers/headphones turned on and plugged in correctly?
- Check Track Input/Output: Is the correct input selected for your recording track? Is the track’s output routed to the master?
- Mute/Solo Buttons: Is the track you’re trying to hear (or record) muted or soloed incorrectly?
- Phantom Power: If using a condenser mic, is +48V phantom power engaged on your audio interface?
- Cable Connections: Double-check all physical cable connections.
4. Software Crashes or Freezes 🥶
The dreaded “Your DAW has stopped responding.”
- Cause: Incompatible plugins, too many demanding plugins, insufficient RAM, outdated software/OS.
- Solution:
- Update Everything: Ensure your DAW, plugins, audio interface drivers, and operating system are all up to date.
- Isolate Problematic Plugins: If crashes occur after adding a specific plugin, try removing it or updating it. Some plugins are notoriously unstable.
- Save Regularly: This is your best defense! Use your DAW’s auto-save feature.
- Increase RAM: If you’re constantly running out of memory, more RAM is often the solution.
- Run as Administrator (Windows): Sometimes running your DAW with administrator privileges can resolve stability issues.
5. Missing Soundpools or Instruments (The MAGIX Music Maker Dilemma) 📦
This is precisely the issue raised in the magix.info forum about moving MAGIX Music Maker to another computer (magix.info).
- Cause: When you move a DAW or its associated content (soundpools, virtual instruments, samples) to a new location or computer, the software loses the path to those files.
- Solution:
- Relink Paths: Most DAWs have a “Preferences” or “Settings” section where you can specify the paths to your sample libraries, VST/AU plugins, and soundpools. You’ll need to manually point the DAW to the new locations.
- Reinstall Content: If relinking doesn’t work, you might need to reinstall the soundpools or instruments. For purchased instruments, ensure you have your license keys or account login details handy.
- Deactivate Old License: As the
magix.infoarticle implies, some software licenses are tied to a specific computer. Before moving to a new machine, always deactivate your license on the old computer. This prevents issues with activating on the new one and avoids potential re-purchase. - Backup Content: Always back up your soundpools, custom samples, and instrument libraries separately from your DAW installation. This makes migration much smoother.
- Our Take: “I’ve been there, staring at a project full of ‘missing file’ errors,” says Alex. “It’s a nightmare. The key is proactive file management and understanding your DAW’s library settings. Always read the migration guide for your specific software!”
General Troubleshooting Workflow 🧠
- Restart: The classic IT solution. Restart your DAW, then restart your computer. It often works wonders.
- Isolate the Problem:
- Does it happen in all projects or just one? (If one, project-specific issue).
- Does it happen with all plugins or just one? (If one, plugin issue).
- Does it happen with all audio interfaces or just one? (If one, interface issue).
- Check Online Resources: Google your specific error message or problem. Chances are, someone else has encountered it. Check official forums, Reddit communities (e.g., r/audioengineering, r/DAWname), and YouTube tutorials.
- Consult Manuals/Support: Don’t be afraid to read the manual for your DAW or audio interface. Contact the manufacturer’s support if you’re truly stuck.
Troubleshooting can be frustrating, but it’s also a learning experience. Each time you solve a problem, you gain a deeper understanding of your music maker and your system. Keep calm, be systematic, and you’ll get back to making music in no time!
🎉 Inspiring Success Stories: Musicians Who Started with Music Makers
Sometimes, when you’re deep in the trenches of learning a new DAW or battling a stubborn mix, it’s easy to feel overwhelmed. You might wonder if all this effort will ever lead anywhere. That’s why we love sharing inspiring success stories at Make a Song™! These tales remind us that every musical journey starts somewhere, often with humble beginnings and accessible tools. From bedroom producers to global superstars, many artists got their start with simple “music makers” and a burning passion.
The Bedroom Producer Revolution 🛌
The rise of affordable DAWs and powerful computers truly democratized music production. Suddenly, you didn’t need a million-dollar studio to make professional-sounding tracks.
- Billie Eilish & FINNEAS: Perhaps one of the most prominent recent examples. Much of their Grammy-winning debut album, “When We All Fall Asleep, Where Do We Go?”, was recorded and produced in FINNEAS’s childhood bedroom using Logic Pro X, a single microphone (Audio-Technica AT2020), and a basic audio interface. Their story is a testament to the power of creativity over expensive gear.
- Flume: The Australian electronic music sensation started making beats in his bedroom using Ableton Live. His unique sound design and innovative production quickly propelled him to international fame, proving that a distinctive artistic vision, combined with a powerful DAW, is a winning formula.
- Grimes: Known for her experimental electronic music, Grimes famously produced much of her early work, including her breakthrough album “Visions,” entirely on GarageBand and Ableton Live in her apartment. Her DIY ethos is a huge inspiration.
From Mobile Apps to Mainstream 📱
The accessibility of mobile music makers has also created new pathways to success.
- Steve Lacy: The Grammy-nominated artist and producer, known for his work with The Internet and his solo career, famously produced early tracks for himself and others (including Kendrick Lamar!) using just his iPhone and GarageBand iOS. He proved that the ideas matter more than the gear.
- Many TikTok Stars: Countless artists have leveraged mobile apps and simple setups to create viral hits on platforms like TikTok, launching their careers from their phones. The immediacy of mobile music making allows for rapid content creation and direct audience engagement.
The Enduring Spirit of Traditional Music Makers 🎻
While modern DAWs and apps dominate the conversation, it’s vital to remember that “music makers” also encompass the artists who preserve and create traditional forms of music. Organizations like the Music Maker Foundation highlight this beautifully.
- Jeffrey Scott: As we learned earlier, Jeffrey Scott is a Piedmont blues musician whose story is championed by the Music Maker Foundation (musicmaker.org). He’s a “living link” to a rich musical heritage, and his perseverance in holding onto his music through life’s hardships is incredibly inspiring. His “music maker” might be his voice and guitar, passed down through generations, rather than a DAW. The foundation’s work ensures his music continues to travel and be shared.
- Earnest “Guitar” Roy: Another artist supported by the Music Maker Foundation, Earnest “Guitar” Roy learned the blues from his father and is now “leading the way” for a new chapter at the foundation’s studio (musicmaker.org). His dedication to his craft and his aspiration to continue the blues tradition, regardless of the tools, is a powerful reminder that the artist’s spirit is the ultimate music maker.
These stories, from the digital pioneers to the torchbearers of tradition, share a common thread: passion, persistence, and the courage to create. They remind us that the most important “music maker” is you – your ideas, your voice, and your unique perspective.
So, whether you’re starting with a free app or investing in a professional DAW, remember that every great artist started somewhere. Your journey is just beginning, and who knows? Your story might be the next one we’re sharing to inspire others!
📚 Recommended Learning Resources and Tutorials for Music Makers
So, you’re fired up, inspired, and ready to dive deeper into the world of music making! That’s the spirit! At Make a Song™, we firmly believe that continuous learning is the key to growth as an artist and producer. The good news is that the internet is a treasure trove of knowledge, offering everything from beginner guides to advanced techniques. But with so much out there, where do you even start? We’ve curated a list of our favorite, most reliable learning resources to help you on your journey.
1. Official Documentation & Tutorials (Often Overlooked Gems!) 💎
- Your DAW’s Manual: Yes, really! While daunting, your DAW’s official manual (usually a PDF or online help guide) is the most comprehensive and accurate source of information about its features.
- Manufacturer Tutorials: Most DAW developers (Ableton, Apple, Image-Line, Presonus, Avid) offer excellent official video tutorials and guides on their websites. These are often the best place to learn the basics of your specific software.
2. Online Course Platforms (Structured Learning) 🎓
For a more structured, in-depth learning experience, online course platforms are invaluable.
- Coursera / edX: Look for courses from reputable universities or industry experts. You can find courses on music production, sound design, mixing, and even music theory.
- Example: Berklee College of Music offers courses on Coursera.
- Udemy / Skillshare: These platforms host thousands of courses taught by independent instructors. You can find highly specific tutorials on individual DAWs, plugins, or genres.
- Tip: Always check reviews and instructor credentials before purchasing a course.
- MasterClass: Offers courses from world-renowned artists and producers (e.g., Timbaland, deadmau5). While not always hands-on, they provide incredible insights into the creative process.
- Producertech / Point Blank Music School: Dedicated online schools for electronic music production, offering comprehensive courses and certifications.
3. YouTube Channels (Visual & Free!) 📺
YouTube is a goldmine for free tutorials. Here are some channels we highly recommend:
- Your DAW’s Official Channel: (e.g., Ableton, FL Studio, Logic Pro X) – Always a great starting point.
- Andrew Huang: Fantastic for creative ideas, sound design, and general music production tips across various DAWs.
- Rick Beato: While often focused on music theory and analysis, his “What Makes This Song Great?” series offers incredible insights into song structure and production.
- MixWithTheMasters: Features masterclasses from legendary mixing engineers. (Often paid content, but they have free snippets).
- Reid Stefan (Reidiculous): Great for FL Studio users, focusing on beat-making and production techniques.
- Mr. Bill’s Tutorials: Deep dives into sound design and advanced production techniques, often using Ableton Live.
- The Produce Like A Pro Channel (Warren Huart): Excellent for recording, mixing, and general studio techniques, with interviews and gear reviews.
- Make a Song™ YouTube Channel: (Shameless plug!) We’re constantly adding new tutorials and tips on Melody Creation, Lyric Inspiration, Instrument Tutorials, and DIY Recording Studio setups. Subscribe to stay updated!
4. Forums & Online Communities (Peer Learning & Support) 💬
Connecting with other music makers is invaluable for troubleshooting, getting feedback, and staying motivated.
- Reddit:
r/WeAreTheMusicMakers: A general community for musicians and producers.r/audioengineering: For more technical discussions on mixing, mastering, and gear.r/DAWname(e.g.,r/ableton,r/FL_Studio,r/Logic_Studio): Dedicated communities for specific DAWs.
- Gearspace (formerly Gearslutz): A long-standing forum for professional audio discussions, gear reviews, and technical advice.
- Official DAW Forums: Many DAWs have their own dedicated user forums (e.g., Ableton Forum, Image-Line Forum).
5. Books & E-books (Timeless Knowledge) 📖
Sometimes, a good old-fashioned book is the best way to absorb complex information.
- “Mixing Secrets for the Small Studio” by Mike Senior: A highly recommended book for anyone learning to mix in a home studio. Practical, clear, and comprehensive.
- “The Mixing Engineer’s Handbook” by Bobby Owsinski: A classic resource for mixing techniques.
- “The Art of Mixing” by David Gibson: Focuses on the visual aspects of mixing and sound placement.
6. Practice, Practice, Practice! (The Most Important Resource) 🎧
No amount of tutorials will replace hands-on experience.
- Experiment: Don’t be afraid to break things, try weird effects, and push boundaries.
- Finish Projects: It’s easy to start many projects and finish none. Make a conscious effort to complete tracks, even if they’re not perfect.
- Get Feedback: Share your music with trusted friends or online communities and be open to constructive criticism.
The journey of a music maker is a continuous loop of learning, creating, and refining. Embrace the process, stay curious, and never stop exploring the endless possibilities of sound!
🔗 Recommended Links for Music Maker Enthusiasts
Beyond the learning resources, there’s a whole world of websites, blogs, and communities that keep us at Make a Song™ inspired, informed, and connected. Here’s a curated list of links that every music maker enthusiast should have in their bookmarks!
Industry News & Reviews 📰
- MusicRadar: https://www.musicradar.com/ – Comprehensive news, reviews, and tutorials across all aspects of music production, gear, and instruments.
- Sound On Sound: https://www.soundonsound.com/ – A highly respected magazine and website offering in-depth reviews, technical articles, and interviews with top producers.
- Ask.Audio: https://ask.audio/ – News, reviews, and tutorials for various DAWs and music production techniques.
- Synthtopia: https://www.synthtopia.com/ – Your go-to source for all things synthesizers, modular, and electronic music gear.
Sample & Sound Libraries 🎶
- Splice Sounds: https://splice.com/sounds/ – A massive, subscription-based library of royalty-free samples, loops, and presets. A staple for modern producers.
- Loopmasters: https://www.loopmasters.com/ – Another huge resource for high-quality sample packs, virtual instruments, and plugins.
- BandLab Sounds: https://www.bandlab.com/sounds – BandLab’s free, royalty-free sample library, integrated with their music maker.
- FreeSound: https://freesound.org/ – A collaborative database of Creative Commons licensed sounds. Great for unique sound design elements.
Plugin & Software Resources 🔌
- Plugin Boutique: https://www.pluginboutique.com/ – A leading online store for virtual instruments, effects plugins, and software deals.
- KVR Audio: https://www.kvraudio.com/ – A massive database of VST, AU, and AAX plugins, with news, reviews, and a vibrant forum.
- Native Instruments: https://www.native-instruments.com/ – Creators of Komplete, Kontakt, Massive, and other industry-standard virtual instruments and effects.
- FabFilter: https://www.fabfilter.com/ – Known for their incredibly powerful and visually intuitive mixing and mastering plugins (EQ, compressor, limiter).
Music Theory & Songwriting Aids 🎼
- Hooktheory: https://www.hooktheory.com/ – Interactive tools and lessons for understanding music theory and songwriting.
- Chordify: https://chordify.net/ – Get chords for any song from YouTube, Spotify, or SoundCloud.
- RhymeZone: https://www.rhymezone.com/ – An excellent resource for finding rhymes, synonyms, and related words for Lyric Inspiration.
Artist Resources & Business 💰
- Indie Music Academy: https://indiemusicacademy.com/ – Resources and courses for independent artists on marketing, branding, and career development.
- TuneCore Blog: https://www.tunecore.com/blog – Offers valuable insights into music distribution, marketing, and industry trends.
- Music Maker Foundation: https://www.musicmaker.org/ – A non-profit organization dedicated to preserving the musical traditions of the American South by supporting elderly and overlooked artists. A reminder of the roots and heart of music making.
These links represent just the tip of the iceberg, but they’ll provide a solid foundation for your ongoing exploration and growth as a music maker. Happy clicking, and even happier creating!
❓ Frequently Asked Questions About Music Makers
We get a lot of questions here at Make a Song™ about music makers – from absolute beginners to seasoned pros looking for new insights. It’s totally normal to have queries when you’re diving into such a vast and exciting field! Here are some of the most frequently asked questions, along with our expert answers.
Q1: Do I need expensive gear to make good music?
A: Absolutely not! This is one of the biggest myths we love to debunk. While high-end gear can offer certain advantages, your creativity, skill, and understanding of music production are far more important. Many successful artists, like Billie Eilish, started with very basic setups. You can make incredible music with free DAWs like GarageBand or BandLab, an affordable audio interface, and a decent microphone. Focus on learning the fundamentals and honing your craft.
Q2: How long does it take to learn a music maker DAW?
A: It varies wildly depending on the DAW and your dedication!
- Basic functionality (making a simple beat, recording a vocal): A few hours to a few days.
- Intermediate skills (arranging, basic mixing, using virtual instruments): A few weeks to a few months.
- Advanced production (sound design, professional mixing/mastering, complex automation): Years of consistent practice and learning.
Think of it like learning an instrument – you can play a simple tune quickly, but mastering it takes time. Consistency is key! Dedicate regular time to practice, even if it’s just 30 minutes a day.
Q3: Can I make professional-sounding music in a home studio?
A: YES, absolutely! The quality of home studio productions has skyrocketed in recent years. With modern DAWs, high-quality plugins, and a basic understanding of acoustic treatment, you can achieve results that rival commercial studios of the past. The key is to focus on:
- Good source recording: “Garbage in, garbage out.”
- Proper mixing techniques: Balance, EQ, compression.
- Reference tracks: Compare your mix to professional songs.
- Acoustic treatment: Even simple DIY solutions can make a huge difference in your monitoring environment.
Q4: What’s the difference between mixing and mastering?
A: This is a common point of confusion!
- Mixing: The process of blending all the individual tracks (vocals, drums, guitars, synths) in your song into a single stereo file. It involves adjusting volumes, panning, EQ, compression, and effects to make each element sit well together and create a cohesive sound.
- Mastering: The final step after mixing. It’s about optimizing that stereo mix for distribution. This involves applying final EQ, compression, limiting, and stereo widening to achieve commercial loudness, clarity, and consistency across all playback systems. Think of mixing as baking the cake, and mastering as applying the final, perfect icing.
Q5: Do I need to know music theory to make music?
A: ❌ No, not necessarily, especially to start. Many successful producers and beatmakers create incredible music purely by ear and feel. However, ✅ learning some basic music theory (scales, chords, rhythm) can significantly enhance your abilities. It gives you a framework for understanding why certain melodies sound good together, helps with Melody Creation, and makes communication with other musicians much easier. It’s a tool, not a barrier.
Q6: What’s a good first microphone for a home studio?
A: For versatility and value, we often recommend:
- Condenser Mic: Audio-Technica AT2020 or Rode NT1. These are great for vocals and acoustic instruments, offering clear, detailed sound.
- Dynamic Mic: Shure SM57 or SM58. These are workhorses, durable, and excellent for recording loud sources like guitar amps, drums, or robust vocals.
Pair either with a good audio interface, and you’re golden!
Q7: Can I use my gaming headphones for mixing?
A: ❌ We strongly advise against it for critical mixing decisions. Gaming headphones are often designed with exaggerated bass and treble to enhance gaming experiences, which means they don’t provide an accurate, flat frequency response. This can lead to mixes that sound great on your gaming headphones but terrible everywhere else. ✅ Invest in dedicated studio headphones (like the Sony MDR-7506 or Beyerdynamic DT 770 Pro) or, even better, studio monitors for accurate listening.
Q8: How do I protect my music from being stolen?
A: This is a crucial concern for any artist.
- Copyright: In most countries, your music is automatically copyrighted the moment you create it in a tangible form (e.g., recorded, written down). However, registering your copyright with your country’s copyright office (e.g., US Copyright Office) provides stronger legal protection and allows you to sue for statutory damages.
- Metadata: Embed your artist name and copyright info into your audio files.
- PROs: Register with a Performing Rights Organization (ASCAP, BMI, PRS for Music) to track and collect performance royalties.
- Digital Fingerprinting: Distributors use systems like Content ID to identify your music on platforms like YouTube.
- Internal Link: Dive deeper into this topic with our dedicated section on Copyright and Licensing.
Q9: Should I learn one DAW really well or dabble in many?
A: ✅ Start by learning one DAW really well. Mastering one tool will give you a solid foundation in music production principles that are transferable to any other software. Once you’re comfortable, then you can dabble! Many producers use a primary DAW for most of their work and then use others for specific tasks or creative inspiration. Don’t spread yourself too thin initially.
Q10: What’s the best way to get feedback on my music?
A:
- Trusted Friends/Family: Start here, but be aware they might be biased.
- Online Communities: Reddit (e.g.,
r/WeAreTheMusicMakers,r/mixingandmastering), Discord servers, and dedicated forums are great for constructive criticism from other musicians. - Collaboration Platforms: BandLab and Soundtrap allow for easy sharing and feedback within their communities.
- Professional Feedback: Consider paying for a mix/master review from an experienced engineer. It’s an investment that can provide invaluable insights.
Always be open to feedback, but also trust your artistic vision. It’s your music!
📖 Reference Links and Further Reading
Here at Make a Song™, we believe in providing well-researched, authoritative information. Below are the sources and additional reading materials that informed this comprehensive guide to music makers. Dive in and expand your knowledge!
- Grand View Research: Music Software Market Size, Share & Trends Analysis Report
- Music Maker Foundation:
- MAGIX.info Forum: How to Move Music Maker To Another Computer
- Ableton: Ableton Live Official Website
- Apple:
- Image-Line: FL Studio Official Website
- Avid: Pro Tools Official Website
- Cockos: Reaper Official Website
- PreSonus: Studio One Official Website
- Steinberg: Cubase Official Website
- Bitwig: Bitwig Studio Official Website
- BandLab: BandLab Official Website
- Splice: Splice Studio Official Website
- Soundtrap: Soundtrap Official Website
- Koala Sampler: Koala Sampler Official Website
- Korg: Korg Gadget Official Website
- Focusrite: Focusrite Official Website
- Universal Audio: Universal Audio Official Website
- KRK Systems: KRK Official Website
- Yamaha: Yamaha Pro Audio Official Website
- JBL Professional: JBL Professional Official Website
- Audio-Technica: Audio-Technica Official Website
- Sony: Sony Professional Audio Official Website
- Beyerdynamic: Beyerdynamic Official Website
- Shure: Shure Official Website
- Rode Microphones: Rode Official Website
- Akai Professional: Akai Professional Official Website
- Arturia: Arturia Official Website
- Native Instruments: Native Instruments Official Website
- Roland: Roland Official Website
- Moog Music: Moog Music Official Website
- Elektron: Elektron Official Website
- Teenage Engineering: Teenage Engineering Official Website
- Behringer: Behringer Official Website
- DistroKid: DistroKid Official Website
- TuneCore: TuneCore Official Website
- CD Baby: CD Baby Official Website
- Amuse: Amuse Official Website
- Bandcamp: Bandcamp Official Website
- SoundCloud: SoundCloud Official Website
- BeatStars: BeatStars Official Website
- Airbit: Airbit Official Website
- Loopmasters: Loopmasters Official Website
- ASCAP: ASCAP Official Website
- BMI: BMI Official Website
- PRS for Music: PRS for Music Official Website
- SoundExchange: SoundExchange Official Website
- US Copyright Office: US Copyright Office Official Website
- MusicRadar: MusicRadar Official Website
- Sound On Sound: Sound On Sound Official Website
- Ask.Audio: Ask.Audio Official Website
- Synthtopia: Synthtopia Official Website
- Plugin Boutique: Plugin Boutique Official Website
- KVR Audio: KVR Audio Official Website
- FabFilter: FabFilter Official Website
- Hooktheory: Hooktheory Official Website
- Chordify: Chordify Official Website
- RhymeZone: RhymeZone Official Website
- Indie Music Academy: Indie Music Academy Official Website
🏁 Conclusion: Your Journey with Music Makers Starts Here

Wow, what a journey we’ve been on together! From the rich history of music makers to the nitty-gritty of choosing the perfect DAW or hardware, setting up your home studio, and even monetizing your creations — you’re now equipped with the knowledge and inspiration to dive headfirst into making your own music. 🎶
If you’re wondering about MAGIX Music Maker, while it’s a solid entry-level DAW especially for loop-based creation, it comes with some quirks like managing soundpools and instrument libraries when moving between computers, as highlighted in the magix.info forum. For beginners wanting quick results, it’s a decent choice, but if you’re aiming for professional flexibility and growth, consider the other DAWs we reviewed like Ableton Live, Logic Pro X, or FL Studio.
Key takeaways:
- The best music maker is the one that inspires you to create consistently. Don’t get stuck chasing the “perfect” tool.
- Start simple, learn the basics, and grow your skills and gear over time.
- Embrace both software and hardware as complementary tools — the tactile magic of hardware can spark creativity that software alone sometimes can’t.
- Collaboration and sharing are easier than ever — use cloud platforms to connect and grow.
- Protect your music and understand the business side early to monetize your passion sustainably.
Remember Jeffrey Scott and Earnest “Guitar” Roy’s stories — music making is about spirit, perseverance, and sharing your voice, no matter the tools. Your music maker is not just software or gear; it’s you and your unique creative spark.
So, what are you waiting for? Fire up your DAW or dust off that synth, and start making your own song today! 🎉
🔗 Recommended Links for Music Maker Enthusiasts
Ready to gear up or deepen your knowledge? Here are some direct shopping and resource links to get you started or upgrade your setup:
- Ableton Live: Amazon | Sweetwater | Ableton Official Website
- Logic Pro X: Apple App Store | Apple Official Website
- FL Studio: Amazon | Image-Line Official Website
- Pro Tools: Amazon | Sweetwater | Avid Official Website
- GarageBand: Apple App Store | Apple Official Website
- Reaper: Cockos Official Website
- Studio One: Amazon | Sweetwater | PreSonus Official Website
- Cubase: Amazon | Sweetwater | Steinberg Official Website
- Bitwig Studio: Thomann | Bitwig Official Website
- BandLab: BandLab Official Website (Free)
- Moog Subsequent 37: Amazon | Sweetwater | Moog Official Website
- Korg Minilogue XD: Amazon | Guitar Center | Korg Official Website
- Roland TR-8S: Amazon | Sweetwater | Roland Official Website
- Akai MPC Live II: Amazon | Guitar Center | Akai Professional Official Website
- Arturia KeyLab Essential: Amazon | Sweetwater | Arturia Official Website
- Native Instruments Komplete Kontrol S-Series: Amazon | Guitar Center | Native Instruments Official Website
- Focusrite Scarlett 2i2: Amazon | Sweetwater | Focusrite Official Website
- Universal Audio Volt 276: Amazon | Guitar Center | Universal Audio Official Website
- KRK Rokit 5 G4: Amazon | Sweetwater | KRK Official Website
- Yamaha HS5: Amazon | Guitar Center | Yamaha Official Website
- Audio-Technica AT2020: Amazon | Guitar Center | Audio-Technica Official Website
- Shure SM58: Amazon | Sweetwater | Shure Official Website
- Books on Music Production:
❓ Frequently Asked Questions About Music Makers
What’s the best music maker?
There’s no one-size-fits-all answer here. The best music maker depends on your goals, skill level, and workflow preferences. For electronic music and live performance, Ableton Live is often considered top-tier. For Mac users focused on songwriting and recording, Logic Pro X is unbeatable in value and features. If you want a fast beat-making workflow, FL Studio shines. For professional studio recording and mixing, Pro Tools remains the industry standard. Beginners might prefer GarageBand or BandLab for ease of use and accessibility. Ultimately, the best music maker is the one that inspires you to create consistently and fits your unique style.
What is the best music maker software for beginners?
For beginners, GarageBand (macOS/iOS) and BandLab (web/mobile) are excellent starting points due to their intuitive interfaces and free cost. MAGIX Music Maker also offers a loop-based, beginner-friendly environment, though with some limitations. FL Studio Fruity Edition is another beginner-friendly option with a straightforward beat-making workflow. These platforms provide ample tutorials, built-in sounds, and simple workflows that help new users avoid overwhelm and start making music quickly.
How can I create my own song using a music maker app?
Start by capturing your core idea — a melody, beat, or lyric — using the app’s recording or sequencing tools. Build your arrangement by layering drums, bass, chords, and vocals. Use virtual instruments and loops to fill out your track. Edit and refine your parts, then mix by balancing volumes, panning, and adding effects like reverb and compression. Finally, export your track in a high-quality format. Many apps, like GarageBand and BandLab, include tutorials and templates to guide you through this process. Don’t forget to experiment and have fun!
What are the essential features of a good music maker?
A good music maker should include:
- Recording capabilities for audio and MIDI.
- A versatile virtual instrument library or support for third-party plugins.
- Intuitive editing tools for audio and MIDI.
- Flexible arrangement and mixing environments with automation.
- Effects processing including EQ, compression, reverb, and delay.
- Low latency performance for real-time playing and recording.
- Export options in high-quality formats.
- Good documentation and community support to help you learn.
- Compatibility with your operating system and hardware.
These features ensure you can take a song from idea to finished product efficiently.
Can I make professional-quality music with free music maker tools?
Absolutely! Free tools like BandLab, GarageBand, and Cakewalk by BandLab (Windows) are capable of producing professional-sounding music. The quality of your music depends more on your skills, creativity, and understanding of production techniques than on the price tag of your software. Many professional producers use free or low-cost tools for demos and even final releases. However, investing in higher-end software and hardware can offer more features, better sound quality, and smoother workflows as you advance.
How do I move MAGIX Music Maker to another computer without losing soundpools and instruments?
Moving MAGIX Music Maker requires careful handling of your soundpools and instrument libraries. First, deactivate your license on the old computer to free it for activation on the new one. Then, copy all soundpool and instrument folders to the new computer, ensuring you maintain the same folder structure. In Music Maker, update the library paths in preferences to point to the new locations. If you encounter missing files, reinstalling soundpools or instruments might be necessary. For detailed community advice, check the magix.info forum discussion.
📖 Reference Links and Further Reading
- Grand View Research: Music Software Market Report
- Music Maker Foundation: Jeffrey Scott Story
- Music Maker Foundation: Earnest “Guitar” Roy Interview
- MAGIX.info Forum: How to Move Music Maker To Another Computer
- Ableton Live Official Website
- Apple Logic Pro X Official Website
- Image-Line FL Studio Official Website
- Avid Pro Tools Official Website
- Cockos Reaper Official Website
- PreSonus Studio One Official Website
- Steinberg Cubase Official Website
- Bitwig Studio Official Website
- BandLab Official Website
- Splice Studio Official Website
- Soundtrap Official Website
- Koala Sampler Official Website
- Korg Gadget Official Website
- Focusrite Official Website
- Universal Audio Official Website
- KRK Official Website
- Yamaha Pro Audio Official Website
- Audio-Technica Official Website
- Shure Official Website
- Rode Microphones Official Website
- Akai Professional Official Website
- Arturia Official Website
- Native Instruments Official Website
- Roland Official Website
- Moog Music Official Website
- Elektron Official Website
- Teenage Engineering Official Website
- Behringer Official Website
- DistroKid Official Website
- TuneCore Official Website
- CD Baby Official Website
- Amuse Official Website
- Bandcamp Official Website
- SoundCloud Official Website
- BeatStars Official Website
- Airbit Official Website
- Loopmasters Official Website
- ASCAP Official Website
- BMI Official Website
- PRS for Music Official Website
- SoundExchange Official Website
- US Copyright Office
- MusicRadar
- Sound On Sound
- Ask.Audio
- Synthtopia
- Plugin Boutique
- KVR Audio
- FabFilter
- Hooktheory
- Chordify
- RhymeZone
- Indie Music Academy